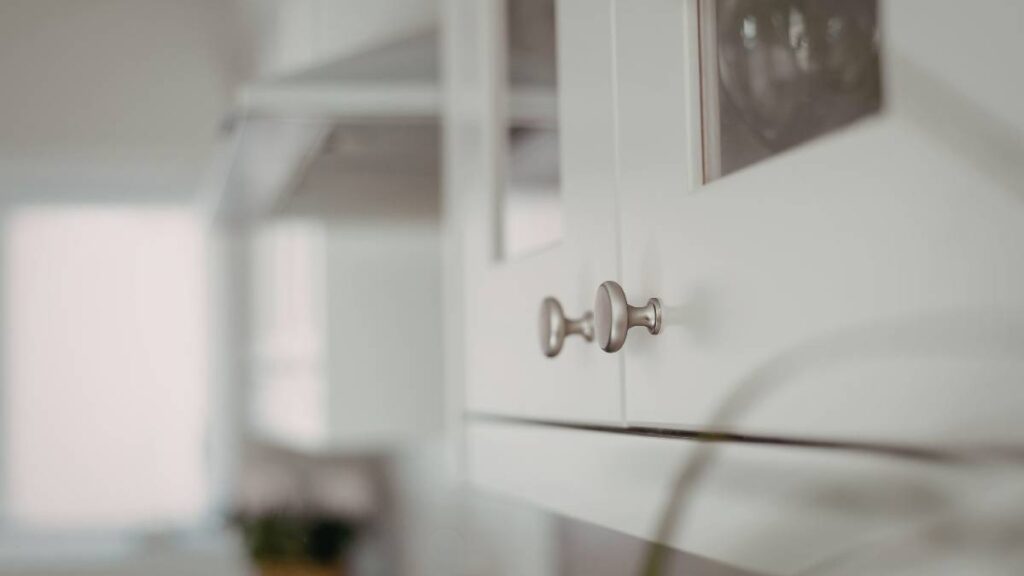
Wobbly cabinet handles test everyone’s patience. Spotting a loose handle just as you reach for a mug can throw off your whole kitchen routine.
This frustration is a common part of daily life, yet learning to tighten cabinet handles can make a tremendous difference in both home comfort and safety.
Explore the detailed guidance below and discover practical ways to keep your cabinet hardware secure, stylish, and trouble-free for the long haul.
Identify What’s Causing the Issue and Act with Confidence
Pinpointing the reason for a loose handle ensures your efforts to tighten cabinet handles aren’t wasted by treating only the symptom.
Begin with a brief inspection. Try gently wiggling the handle horizontally and vertically to test for underlying movement.
Check for Visible Damage and Hardware Problems
Examine the screw heads and base plate. Corrosion, stripped threads, or bent parts directly affect whether you can simply tighten cabinet handles or need replacement hardware.
If you notice wear at the screw head, prepare to replace it. Otherwise, tightening will have no long-term effect and the handle will loosen quickly.
Look for hairline cracks on the cabinetry surface around the handle base; these can prevent tightening from holding as intended.
Assess Screw Type and Handle Placement
The type of screw and how the handle is oriented matter. Ask yourself, “Is this a top-mount or rear-mount screw?” before proceeding with tools.
Rear-mount designs require opening your cabinet door to access the screws from inside, while top-mount ones place screws directly visible on the surface.
Firmly grip the handle with one hand while testing tightness, so you don’t risk further damage to the wood or metal.
| Cause | Symptom | Short-term Fix | Best Next Step |
|---|---|---|---|
| Loose screw | Wiggles but not broken | Tighten with screwdriver | Check for recurring looseness weekly |
| Stripped screw hole | Handle pulls away | Use wood filler | Install larger screw if persistent |
| Broken screw | Only half a screw remains | Remove fragment | Replace with new screw |
| Damaged handle base | Cracking around base | Reinforce with wood glue | Replace handle if necessary |
| Corroded metal | Discoloration, stiffness | Clean and lubricate | Replace corroded part for safety |
Gather All Necessary Tools before Getting Started
Having the right tools streamlines your efforts to tighten cabinet handles and leaves you less frustrated mid-project.
Set out everything you need on a flat, clean surface. This avoids unnecessary delays and accidental scratches on your cabinetry.
Essential Hand Tools for Quick Tightening
A Phillips screwdriver handles most cabinet screws. Flathead designs pop up, so keep one close. Bring needle-nose pliers for small, fiddly nuts on certain handles.
Use a magnetic tray or small dish to hold loose screws during your repairs. Searching for a dropped screw on the floor can interrupt your progress and cause stress.
- Reach for a ratcheting screwdriver if you handle many cabinets, since it speeds up repetitive tightening without stripping screw heads if used correctly.
- Use a compact flashlight or headlamp to see hidden screws inside dark cabinet corners, which ensures thorough tightening and prevents missed handles.
- Fold a thin towel or pad beneath handles while working. This protects both hardware and finish in case a tool slips from your grip.
- Apply painter’s tape around handle bases if you’re new to DIY. This avoids accidental scratching from tool slips and makes cleanup easy.
- Have a soft brush ready to whisk away wood dust or grime before reattaching screws. Clean surfaces help you tighten cabinet handles securely.
Lay out your tool selection in advance so you’re not searching for items mid-fix and risking unfinished work.
Choose the Correct Screwdriver for Your Hardware
Test screwdriver fit by inserting the tip into the screw head gently. You want a snug alignment that transfers direct turning power without slipping or stripping.
Always start with manual drivers. Power drills risk over-tightening, which damages wood and may strip delicate cabinet hardware, making repairs trickier.
- Check driver size before using, ensuring it fits the screw precisely; a poor fit increases slippage and wear on both tool and hardware.
- Always turn drivers clockwise to tighten. If in doubt, remember the phrase “righty-tighty, lefty-loosy” to avoid turning the wrong direction and loosening hardware further.
- Wipe screwdriver heads clean of oil or dust before using. Clean tools provide extra grip and control, leading to more effective tightening results.
- Store screwdrivers upright or magnetically after each use. This keeps them sharp, prevents bent tips, and increases the lifespan of your DIY tools.
- Inspect screwdriver tips for wear and tear every couple of months to ensure they grip cabinet handle screws efficiently and reduce the risk of stripping.
A high-quality manual screwdriver feels balanced in your hand and gives excellent feedback about the tightness of each screw in your cabinet hardware.
Tackle Common Handle Hardware Glitches with Smart Techniques
Applying proven fixes to tighten cabinet handles helps you resolve issues that simple tightening doesn’t solve, keeping repairs practical and budget-friendly.
If you hit resistance or recurring looseness, switch strategies rather than risk damaging your cabinet or hardware.
Restore Stripped Screw Holes for Reliable Tightening
If a screw keeps spinning without gripping, fill the hole with wood glue and a toothpick or matchstick. Trim flush and re-insert the screw once dry.
For visible holes on painted cabinets, use a color-matched wood filler. Press in firmly, let it dry, and re-drill a pilot hole that fits your screw size snugly.
If problems continue after filling, upgrade to a slightly larger screw to help tighten cabinet handles securely and eliminate wobbles for good.
Address Warped or Misshapen Hardware
When a handle won’t align flat to the cabinet surface, check for bent mounting plates or bowed handles. Use firm hand pressure to gently reshape metal.
If hardware remains out of shape, swap for a replacement. Handles that won’t seat properly never tighten for long and make everyday use frustrating.
Always check that the new hardware is the same size and style, ensuring consistent alignment and a professional appearance for your cabinetry.
Build Lasting Results with Preventative Maintenance Habits
Keep your cabinets tight and secure by sticking to a regular check-in schedule. Consistency keeps you from needing constant quick fixes down the line.
Commit to checking all cabinet and drawer handles every few months. It takes just minutes, and prevents surprises during busy mornings or guest visits.
Create and Follow a Home Maintenance Routine
Set reminders quarterly—perhaps at season change—to scan for wobbly or loose hardware. Calendar apps or sticky notes make this easy and hard to forget.
Inspect each handle for smooth movement and firm attachment. Address even minor looseness right away, which helps you avoid stripped screws or cracked wood later.
Write down any recurring problem areas. For example, you might note, “Pantry cabinet needs new screws next time.” A maintenance log speeds up future repairs.
- Spot-test kitchen and bathroom handles during cleaning so you can combine chores efficiently and avoid overlooking out-of-the-way hardware.
- Keep common screwdriver sizes and extra screws handy in a specific drawer for fast response when problems pop up, so nothing stalls a quick fix.
- Regularly wipe handles clean to prevent grease buildup, which can cause extra wear and reduce the effectiveness when you tighten cabinet handles.
- Add handle checks to spring cleaning lists as a double-check measure so deep-clean days also restore hardware security and usability.
- Teach all household members basic tightening techniques—this empowers everyone to handle a loose knob without waiting for help.
Fine-tune your maintenance schedule to match your most frequently used spaces. For example, check kitchen cabinets more frequently than those in the guest room.
Replace Worn or Damaged Hardware Promptly
Don’t work around broken or damaged handles as a long-term solution. Replacement keeps your home’s look fresh and ensures tightening actually works each time.
Choose new handles that match your existing screw hole spacing to simplify mounting, saving time and minimizing need for wood filler or extra drilling.
Upgrade to heavy-duty or solid-core hardware for high-traffic spots. Handles designed for frequent use hold up better and let you easily tighten cabinet handles over time.
Go Beyond the Kitchen: Smart Handle Care Across the Home
Cabinet handles aren’t limited to kitchens. Laundry rooms, bathrooms, and home offices all benefit when you tighten cabinet handles as part of regular upkeep.
Apply techniques from busy kitchen areas in playrooms or craft cabinets, where frequent use means screw loosening can sneak up on you.
Cabinet Handle Care in Shared Spaces
Handles in shared family or communal spaces get more wear than private areas. Add monthly handle checks in these rooms for extra reliability and comfort.
Make it a habit to schedule quick handle inspections alongside household chores like trash day or vacuuming for seamless integration into your routine.
Model proactive behavior by showing family or roommates how to tighten cabinet handles correctly. Use simple instructions: “Twist this driver right until it’s firm but not too tight.”
Special Considerations for Specialty Cabinets
Some built-ins, like antique hutches or glass display cases, have delicate or older hardware. Approach these handles gently, opting for slower tightening and gentler touch.
Keep extra accessories—like washers or replacement screws—for unique hardware styles. Having spares reduces downtime and frustration if a problem arises.
Adapt your tightening technique for unusual mounting systems, such as hidden clamps or bar pulls, by reviewing the manufacturer’s manual or gently testing movement before adjusting.
Achieve a Cohesive Look by Replacing Multiple Handles at Once
Tightening a single loose handle sometimes highlights wear elsewhere. Updating all handles in a space at the same time gives a uniform, refreshed appearance to the room.
Plan your upgrade for times when cabinets are less in use, such as during a family trip or weekend cleaning session, to minimize disruption to daily routines.
Coordinate Finishes and Styles
Select new handles with consistent finishes and design. Matching colors or metals enhances visual harmony, making every cabinet feel purposefully styled and inviting.
Buy handles in sets that include mounting screws, so replacements fit perfectly and you have spares. This streamlines both installation and future fixes.
Install batch orders assembly-line style: unscrew old hardware, clean surfaces, and attach new handles consecutively for maximum speed and flawless results.
Keep Spare Hardware for Future Tightening
Store leftover screws and extra handles in a labeled zip bag or small container, tucked in your tool drawer. Having parts handy turns a loose-handle emergency into a quick fix.
Label the bag with the cabinet location or screw size for stress-free retrieval later, especially helpful if you’re tackling several similar-looking projects over time.
Check spare hardware supply each season. Reorder anything running low so you’re always ready to tighten cabinet handles at a moment’s notice.
Bring It All Together for Secure, Stress-free Cabinetry
Regular attention to loose hardware, using the right tools and techniques, delivers reliable results when you tighten cabinet handles across your home.
Small maintenance steps, like creating a handle check schedule or keeping spare screws, reward you with smoother kitchen and bathroom routines every day.
Step into your next home project with confidence—simple habits, clear instructions, and a focused approach let you keep handles tight and cabinets safe for years ahead.