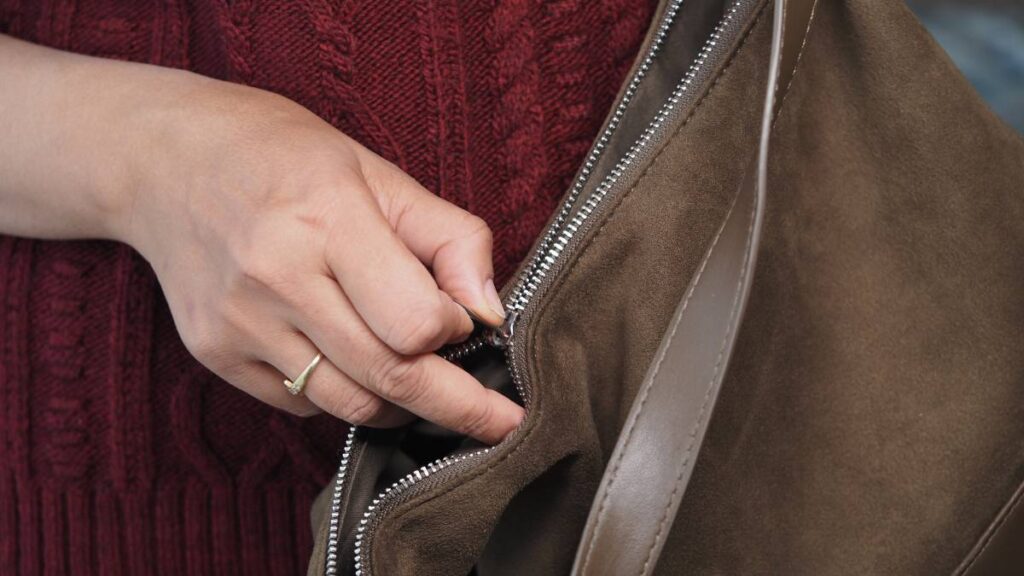
Zippers fail at the least convenient moments—think luggage at the airport, backpacks before a hike, or jeans right before heading out. Having a micro lifestyle fix for a broken zipper lets you sidestep disaster with grace and maintain your momentum.
Sometimes, just knowing a few creative strategies makes the difference between a frustrating setback and a smooth, resourceful response. A broken zipper may seem like a small hiccup, but it can grind your plans to a halt without fast action.
If you want to walk away with confidence, even when your zipper pops, read through these practical tips, actionable examples, and repair secrets. Each section delivers skills you can use today for a temporary fix.
Assessing the Zipper Problem for Immediate Decisions
Understanding what’s gone wrong with your broken zipper helps you decide which remedy to try first. Assessing the damage guides your choices and saves valuable time in the moment.
Before you jump into repairs, examine the zipper’s path, slider, and teeth. Pinpointing the issue directs your fix—and minimizes your risk of making things worse.
Pinpointing a Slider Off-Track Issue
Watch for the zipper slider drifting away from the teeth or refusing to grip both sides. This is typically what people call a “zipped but open” problem. Hold the fabric steady, then gently squeeze the slider with needle-nose pliers until it catches again.
If you don’t have pliers, a sturdy metal key or even the edge of a spoon can sometimes help press the slider gently. You’ll hear a faint click as the sides realign. Try to move the slider slowly back down over the teeth afterward.
If the zipper starts gripping after your adjustment, zip up and down a few times. When it holds, you’ve bought yourself several more uses before a full repair or replacement.
Spotting Teeth Misalignment Scenarios
When zipper teeth are sticking out at wrong angles or disconnected, run your fingers along both sides. Find any places where teeth don’t line up. Gently push them into position using your thumb or a pencil’s blunt end—don’t use sharp objects.
If the teeth are missing or bent beyond reshaping, that area probably can’t be fully fixed temporarily. Instead, focus on getting the slider to stop just before the damage when you close the zipper. This prevents the gap from widening during use.
If you notice frayed fabric around the teeth, avoid pulling firmly—hold the fabric close to the base as you attempt any adjustments. This limits the risk of making the broken zipper unusable until you get home.
| Problem Type | Quick Assessment | Temporary Fix | Best Immediate Action |
|---|---|---|---|
| Slider lost grip | Teeth join but separate after zipping | Squeeze slider gently to tighten grip | Use pliers or metal key to press slider |
| Teeth misaligned | Jagged or uneven tooth tracks | Align teeth with fingers or pencil | Don’t use sharp items; press gently |
| Slider off track | Slider has jumped off zipper base | Thread slider back onto teeth edge | Work from the bottom of the zipper |
| Stopper broken | Slider runs past the end of zipper | Add a paperclip or safety pin as stop | Reinforce both sides to trap slider |
| Missing teeth | Gap in zipper; slider stalls or pops open | Secure slider below missing area | Use temporary stitches across the gap |
Everyday Items That Become Instant Zipper Tools
When a broken zipper stops you mid-task, ordinary objects can stand in as temporary tools. Knowing which items deliver the fastest relief ensures you waste no time digging through drawers or bags.
Household solutions work because they’re immediately accessible even on the go. The short step-by-steps below let you restore function using what’s at hand.
Repurposing Items: Pens, Paperclips, Safety Pins, and More
Grab a paperclip to stand in for a missing zipper pull—thread it through the slider’s hole for instant grip. Unbend a metal twist tie to poke out lint jamming the zipper track. For backpacks, loop a shoelace as a sturdy emergency handle.
- Bend a small paperclip into a hook shape, then attach it to the slider. This lets you zip and unzip the broken zipper with ease, while preventing further strain.
- Slide a safety pin horizontally across the fabric just above the slider if you notice the stopper is missing. The pin halts the slider’s progress, averting further damage or separation.
- Use a pencil or crayon’s tip to lubricate a sticky zipper by rubbing it along both rows of teeth. This reduces resistance, often restoring smooth motion for several uses.
- Tie a string or a shoelace through the slider’s pull hole if your zipper comes off mid-use and you need leverage to get it back on track. Pull evenly to prevent further misalignment.
- Insert a bobby pin as a temporary stopper at the top or bottom of the zipper. Snap it sideways through the fabric folds to hold the slider in place during movement.
Transforming everyday objects into micro-tools adds flexibility to your problem-solving toolkit. By having a few of these items handy, you strengthen your ability to tackle broken zipper emergencies wherever you are.
Quick Lubrication: Fixing Stubborn or Jammed Zippers
Rubbing a candle’s wax or a graphite pencil up and down the zipper teeth creates a smoother track. This method works when pulling the slider feels sticky or grating. You’re essentially greasing the gears without leaving excess residue.
- Rub a wax candle gently along both sides for a temporary fix if you notice the zipper catching or resisting at one spot. This trick mimics the original zipper’s built-in glide.
- Drag a graphite pencil’s point over the metal teeth to transfer a thin, dry lubricant layer. It’s clean, invisible, and can be reapplied after every few zips.
- Apply a small dab of hand soap on a Q-tip and run it lightly up the teeth. This smooths out snags, especially on plastic zippers, without any mess or discoloration.
- Run the edge of a crayon back and forth for a few passes if wax or graphite aren’t available. The waxy pigment acts as a gentle zip-enhancer in a pinch.
- If your zipper is metal, a tiny touch of lip balm (applied with a cotton swab) can help, but avoid it on fabrics that might stain easily or trap greasy spots.
Improvising lubricants like these gives you hands-on experience in micro repair skills and a sense of control over wardrobe or gear malfunctions.
Securing the Zipper for Short-Term Use
Once a broken zipper is stabilized, securing it with household materials is the crucial next move. This ensures your clothing or bags stay functional for the rest of your outing, reducing embarrassment or disruption.
The short-term goal is to keep the zipper shut and the contents (or modesty) protected using small adjustments and quick closures with items like safety pins or thread.
Assembling a Temporary Closure with Safety Pins
Gather two or three safety pins of varying sizes. Close the slider completely, then pin the zipper tape alongside the teeth, making sure the pins bridge both sides securely without gaps. Space the pins an inch apart for reliable closure.
If carrying heavier items in a bag, use larger pins at high-stress points (bottom, corners). For jeans, pin inside to avoid visible hardware. Double-check every pin for sharp points before moving around to prevent pricks or snags in fabric.
Sharing tip: If your friend says, “My zipper blew out on my duffel,” hand them two jumbo pins, set them at the base, and show them how to pin and press flat for comfort.
Tacking with Thread or Dental Floss for Subtle Concealment
When pins aren’t available, use a needle and thread or unraveled dental floss. Sew 3–4 quick stitches horizontally across the zipper between the teeth, just above or below the slider. Make knots on the inside, out of sight. This method is ideal for a day’s fix.
Dental floss is strong, invisible, and easy to remove later. Work with short, controlled passes—be careful not to pierce through the outside layer of the garment or bag, keeping your repair discreet and professional for public situations.
Once your stitches are in, try the slider gently to make sure it moves freely and the barrier holds. If your broken zipper separates, tug back and forth to test strength. If the thread holds, you’re ready for another few hours of use.
Reinforcing with Creative Patching Techniques
Patching is uniquely useful when facing gaps or missing zipper teeth. Mastering fast fixes with fabric tape, iron-on patches, or even sturdy stickers gives your broken zipper a chance at staying closed until permanent repair is possible.
Applying Fabric Tape or Stickers to Hold the Closure
Layer fabric tape sticky-side down along the inside zipper seam where gaps appear. Press down hard for a flush fit. A wide, clear packing tape works too for non-fabric items. Check that both edges stay sealed when tension is applied.
Bags or pouches with missing teeth respond well to an “X” shape tape pattern: lay one piece diagonally, and then cross the second over it for reinforcement. Use scissors to round off sharp corners, stopping peeling before it starts during use.
If the zipper is on a jacket or hoodie, pick a matching sticker or fabric patch for outside style and inside grip. This keeps your fix invisible from a distance while minimizing awkward moments in daily activity.
Iron-On Patch Strategies for Clothing Zipper Gaps
Place a small iron-on patch on the inside surface, just above or below where teeth are missing. Press with a warm, not hot, iron for 10 seconds. Let cool before flexing. The patch’s adhesive bonds the area, blocking the slider from crossing into the gap.
Pair this technique with a row of small hand stitches on thicker fabrics. For example, if pants are involved, layer the patch inside, then add quick top-stitches for strength. Practice the phrase: “Just patched it—should hold till tonight.”
If adhesive patches are unavailable, double up strong masking tape, applying firmly to the inside of the fabric. Overlap the ends and trim excess so no sticky edge remains. This stops clothing or bag items from pushing through under mild strain.
When Replacement Isn’t Possible: Holding Out for Repairs
Sometimes, you’re nowhere near tools for a real repair. Trust these last-resort fixes to keep your broken zipper closed just long enough—whether traveling or at work—without any visible fuss.
Sturdy temporary closures act as social confidence boosters, letting you enjoy plans as usual. Keep your hands at your sides or carry a light accessory to draw attention elsewhere.
Folding and Clipping Techniques for Discreet Solutions
If it’s a jacket, fold the zippered edge inward and secure with binder clips under a scarf. Use color-matched hairbands or elastic cords at both ends for less visible restraint. Maintain smooth posture as you move to avoid shifting any temporary fix.
Bags or briefcases can be quickly wrapped with a length of twine or soft rope around the top. Line up the zipper’s teeth edge-to-edge, wrap tightly twice, and tuck the ends into the bag’s pocket. Don’t overtighten to avoid distorting fabric.
Pair any folded fix with direct verbal confidence—practice answering, “Zipper issue—handling it ’til I get home,” as needed. These micro lifestyle skills help you relax while maintaining composure in public or at work events.
Best Fixes for Travel, Work, and Social Events
For travel, tuck a few safety pins, paperclips, and short sections of double-sided tape into your bag’s side pocket. For your job, keep a mini sewing kit in your desk. If heading to a party, tape your zipper from the inside, then smooth the outer fabric to hide the join.
Avoid aggressive zipper pulling—go slowly to protect the repair as long as possible. If the repair starts to give, reinforce with a second pin or additional patch. These approaches add time, not pressure, to your repair window.
Your awareness of micro skills keeps wardrobe and accessory troubles in check. It’s a small investment for huge peace of mind over the course of your day or trip.
Staying Prepared: The Micro Zipper Rescue Kit
Building a zipper rescue kit arms you with the right resources to handle sudden broken zipper emergencies. Stock these simple tools in your bag, vehicle, or workspace so you’re ready for quick repairs anytime.
- Add five medium safety pins for reliable, discreet closure fixes on clothing or bags. Their rounded ends won’t snag fabrics and are easy to reuse.
- Carry a compact sewing kit with needles, strong thread, and mini scissors. It lets you reinforce repairs or tack down rogue zipper teeth at home or on the move.
- Include a graphite pencil (or small wax crayon) for lubricating sticky zipper teeth for repeated operation, especially under stress.
- Stash two paperclips and one binder clip for emergency pulls or clip-on closure—these work for everything from backpacks to luggage.
- Add a small strip of fabric tape and a pre-cut iron-on patch. These patches cover gaps and stick down peeling edges on travel or outdoor gear zippers.
Maintaining a micro kit like this builds daily confidence to face unexpected zipper mishaps. It transforms annoyance into ability whenever a broken zipper threatens your plans.
Frequently Asked Questions
What’s the quickest way to fix a broken zipper in public?
Use a safety pin or paperclip to hold the zipper closed and keep your hands by your side. Avoid pulling on the fabric. When possible, pin or tape from the inside for less visibility.
Can I use household items to replace a missing zipper pull?
Yes. A paperclip, keyring, or even a twist tie can be threaded through the pull hole. This lets you operate the broken zipper easily until a permanent repair is available.
How do I keep a broken zipper from opening further if teeth are missing?
Sew a few quick stitches across the zipper just above the slider using strong thread or dental floss. This forms a temporary ‘stop’ and prevents the slider from passing the damaged area.
What’s a safe lubricant for a jammed or stiff zipper?
Rub a graphite pencil along the teeth, use a wax candle, or very small dab of hand soap for smooth motion. Avoid greasy or staining lubes, especially if the zipper runs through fabric clothing.
Should I pull forcefully to close a separated zipper?
No—pulling hard can make the damage worse. Instead, realign misaligned teeth by hand, squeeze the slider with pliers or a sturdy key, then try moving the slider gently and slowly to reseat it.