Settling in at your desk only to feel a subtle—but nagging—tilt is a classic micro-annoyance. That wobbly table lurks in kitchens, home offices, cafes, and everywhere in between. Correcting stubborn furniture is a micro lifestyle skill anyone can learn.
Stable surfaces make everything from working on your laptop to enjoying a meal less irritating and much safer. A wobbly table left unattended can lead to spilled drinks, frustration, or even minor injuries. Addressing it quickly saves time and stress later.
This guide explores proven, quick, and lasting DIY fixes for the bane of wobbly tables. If you’ve ever wedged cardboard or felt under a leg, you’re on the right path. Dive in to swap annoyance for steady comfort.
Pinpointing the Source Means Saving Time and Effort
Identifying why your wobbly table rocks or teeters is the first—and most crucial—step. Jumping to fixes before diagnosing the issue can mean wasted effort or extra work.
Instead of guessing, flip your table over gently. Check each leg individually. Feel for loose bolts, uneven wear, or warping. People sometimes mutter, “I wish I could see what’s wrong with this thing!” Flip and inspect before acting.
Wobble Test: Hands-On Approach to Diagnosis
Once your table’s upside-down or on its side, put light pressure on each leg, pressing near the joints. If it shifts or rocks, that’s a clear sign of loose hardware or a worn joint. Tighten or shim as directed.
If your table visibly sways side-to-side but the legs seem firm when prodded, look underneath for a damaged apron or stretcher. Small cracks or old glue contribute to a persistent wobbly table. Address those areas before moving on.
Imagine a chair that creaks only when you shift—tables can behave the same way. Keep shifting your grip and angle to catch subtle movements you might miss otherwise. Thorough inspection finds small causes that skip obvious checks.
Common Culprits Mapped Out
Loose screws, missing bolts, uneven floors, and softened wood are the main reasons tables wobble. Small children using the table as a jungle gym can also stress joints, causing looseness over time.
In apartments with hardwood floors, even a subtle slope in the building can create a wobbly table. If your repairs fail repeatedly, use a level across the top and sides to check for floor unevenness.
Wood expands and contracts with humidity changes, so a solid table one season might become wobbly next season. Making seasonal adjustments is normal with real wood furniture in most homes.
| Common Cause | Visual Cue | Solution | Takeaway |
|---|---|---|---|
| Loose Legs | Joints separate slightly when table is rocked | Tighten screws/bolts | Always check hardware first |
| Short Leg | Table leans; visible gap under one leg | Add shim or furniture pad | Leveling fixes most issues fast |
| Warped Top | Surface undulates, not flat | Gentle weight, sanding, or replacement | Surface repair sometimes needed |
| Floor Irregularity | Table stable elsewhere, wobbly in one spot | Test in new location or with adjustable feet | Verify location before changing table |
| Loose Stretcher | Wobble remains after tightening legs | Glue and clamp/stretchers | Secondary supports need fixing too |
Securing Table Legs Locks In Stability Fast
Direct action on wobbly table legs creates a clear improvement most people notice immediately. Always tighten all joints before other repairs to lock in stability fast.
Raise the table upside down on a padded surface or rug. Gather tools like a screwdriver or Allen wrench. Use a flashlight for extra visibility at all connection points.
Inspection Checklist: Leg-to-Table Connections
Run down this quick inspection: Confirm every screw is fully tightened but not stripping the wood. Press the legs—if any shift, re-tighten or replace hardware for that joint.
- Examine screw heads for wear—they should fit tools snugly for maximum grip.
- Press legs inward and outward—movement means re-tightening is mandatory to stop wobbles.
- Wipe dust from connectors to ensure a secure grip for re-assembled parts.
- If hardware is missing or mismatched, standard replacement kits usually fit most tables.
- If any fixings spin without tightening, add wood glue or insert a matchstick for grip.
Return the table upright. Give it a firm shake from each corner. If the wobbly table persists, repeat the tightening process until firm.
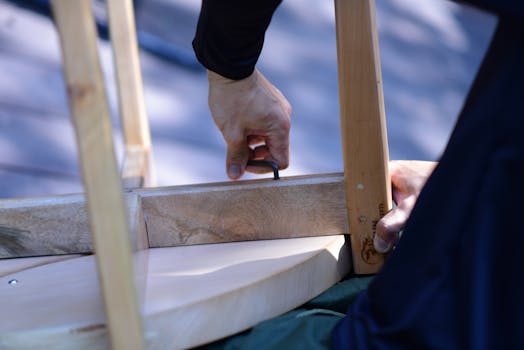
Leg-Brace Reinforcement
If your connections are tight but the wobbly table returns, consider leg-brace reinforcement. Thin L-brackets screwed inside the corners add impressive strength with minimal visibility, providing a longer-lasting fix than glue alone.
- Choose a bracket size that matches your table’s thickness—oversized hardware is overkill and can split wood.
- Drill pilot holes before installing screws to avoid cracking or splitting the material.
- Use included screws or replace with longer ones for deeper grip—consistency matters here.
- If the leg is structurally compromised, clamp it while glue and bracket set for two hours.
- Test the result by pushing firmly in several directions—the wobble should be gone, or noticeably reduced.
Leg-brace reinforcements also reduce future shifting and extend your table’s usable life noticeably if it sees frequent use for work or meals.
Quick-Level Fixes That Remedy Uneven Floors Instantly
When the floor is to blame, quick-level remedies make the difference instantly. Even new homes have slight slopes; adjustable fixes compensate.
Design analogies help. Think of table shims like wearing one sneaker with a thicker sole when one leg is shorter. The goal is a level, steady walk—or in this case, table.
Shim Placement for Lasting Effect
Folded cardboard, adhesive furniture pads, or adjustable rubber glides level a wobbly table within a minute or two. Sit at each side and rock the table to identify which leg needs lifting.
Slide your chosen shim under the offending leg. If the first attempt isn’t perfect, double the thickness or reposition. Thin felt pads help on hard floors, while rubber pads grip firmly on tile or laminate.
A practical step: Say aloud, “It’s steady over here, but still wobbly when I lean this way.” Keep shimming until all sides feel stable and comfortable for daily use.
Reusable Shims and Temporary Fixes
For renters or improvised solutions, reusable shims work best. Silicone or rubber leveling feet withstand repeated adjustments without losing grip. Choose versions with self-adhesive backing for zero-slip performance on slick surfaces.
If guests are minutes away, a quick kitchen fix is to fold a piece of cardboard or napkin and wedge it under the short table leg. Don’t forget to replace with a more durable fix later.
Reusable shims and pads pack flat when you move, making them ideal for people who rearrange furniture frequently or move between apartments.
Building Table Strength Using Everyday Materials
Some wobbly tables need added strength, not just quick levelers. Use supplies you likely have at home: wood glue, clamps, and even spare brackets for invisible reinforcement.
Adding reinforcement ensures the table can handle heavier weights and lively gatherings—micro lifestyle skills make you handy, fast, and resourceful.
Wood Glue: Fast Repairs for Loose Joints
Inject wood glue into loose joints for a non-invasive, lasting repair. Use a small brush or a disposable straw to drive glue deep into the joint. Clamp firmly for at least an hour for lasting grip.
After unclamping, wipe away any excess glue with a wet towel before it dries. Many people focus only on visible screws, but glue repairs inside loose joints add remarkable strength to a wobbly table.
If you hear a soft pop as you reapply pressure after gluing and clamping, that’s a good sign the repair is holding securely.
Discreet Bracing for Long-Term Support
Install thin corner brackets out of sight—inside apron corners or under the table. Match bracket color to your table or paint them for a concealed result. Make pilot holes before attaching to avoid splitting.
Ask someone to press the leg in place as you drive in screws, ensuring a flush fit for the best support. This technique turns even mid-quality tables into rock-solid surfaces for work or dining.
When in doubt, reinforce both visually loose and opposite-side stable joints. Even a solid side can become wobbly over time if not addressed preemptively.
Refreshing Surfaces: Sanding and Resealing for Micromovements
Smooth surfaces prevent micro-wobbles you notice when writing, eating, or juggling a vase. Sometimes, surface undulations cause unsteady feelings, even when the legs are firm.
Analogous to planing a door that sticks in humid weather, sanding a warped table top restores true level. Always sand with the grain and wipe dust away for the best result.
Surface Sanding: Step-by-Step for Micro Stability
Start with medium-grit sandpaper, focusing on high points where your hand feels a wave or dip. Sand slowly, checking progress with a straightedge or level periodically.
If damage is localized, sand only the affected area—not the entire top. If refinishing, sand the complete surface evenly before applying a protective sealant or oil.
After sanding, recheck that the table is level and stable. Sometimes, sanding can lower one side slightly, so adjust shims or pads if needed to correct a newly wobbly table.
Sealant Choices for Everyday Use
Protect your freshly sanded surface with polyurethane, wax, or natural oil. Brush or rub the finish with the grain, using several thin coats for durability. Allow full drying between coats to ensure lasting protection.
For tables with frequent spills, opt for water-resistant sealants. If you use your table mostly for crafts or paperwork, a basic satin finish usually suffices and is easier to reapply later.
Sealant and sanding combined keep your table’s surface flat, durable, and resistant to micro-movements, so the wobbly table problem won’t return every season.
Pro Hack: Custom Inserts and Permanent Levelers
Installing adjustable feet or custom inserts delivers a professional repair that won’t budge over time. The result feels like a luxury upgrade, with barely any visible sign of intervention.
Packaged leveling inserts are available at most hardware stores. With a drill and simple tools, even novice DIYers can create custom solutions for a stubborn wobbly table in under an hour.
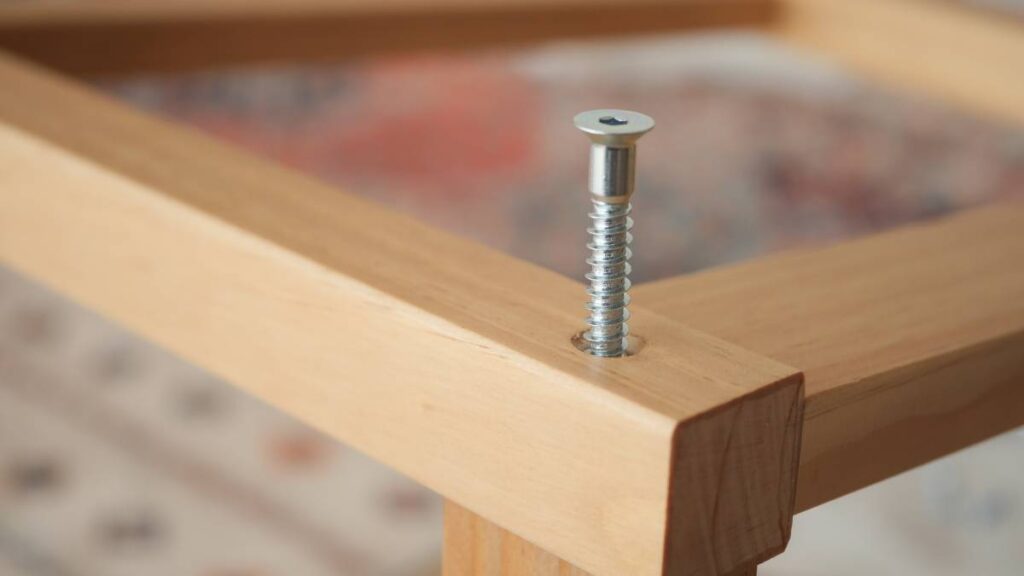
Selecting and Installing Leveling Hardware
Choose inserts compatible with your table leg diameter and thread size. Drill pilot holes first to ensure tight fit. Screw in the insert, then adjust the foot or bolt by hand for a level, stable stance.
If your wobbly table has hollow legs, use glue-in versions or sleeves designed for metal and plastic. Avoid overtightening, which could split wood or damage leg ends. Follow manufacturer instructions step by step.
Test by leaning and rocking on all sides. Adjust height incrementally. If the floor settles further (as with old houses or wood subfloors), re-crank the feet without removing the table from use.
Plug and Play Table Levelers
Modern plug and play table levelers require zero tools—snap into pre-drilled holes and twist to adjust. Some include rubberized ends for extra grip, ideal for tile or hardwood floors.
Having adjustable feet pre-installed when you buy furniture makes a wobbly table much less likely. If you build or restore tables, add these at the start for future proofing.
If a child says, “The table moved when I leaned on it!” after installation, adjust each foot slightly until you have perfect stability across corners and center.
Repair Strategies for Heirloom or Vintage Tables
Vintage or heirloom pieces deserve special attention. Repairs must preserve appearance and function, retaining value and sentimental appeal. Always test fixes on hidden spots first to avoid altering finishes unrepairably.
Classic joinery methods like mortise-and-tenon loosen through decades of daily use, especially in softer woods. Using modern glue techniques helps stabilize antique furniture discreetly for another generation.
Preserving Original Hardware and Finish
If original screws or bolts are corroded but salvageable, soak in rust remover overnight and buff gently before re-installing. Use matching materials to blend repairs with the original table’s tones and textures.
If screw holes have enlarged, insert wood toothpicks coated in glue for added grip before re-screwing. This age-old hack prevents further wobbly table problems without adding visible hardware or patches.
Protect existing finish by taping edges before clamping or repairing joints. Use felt or cork pads to prevent new scratches during the repair process—a micro skill that every furniture fixer should know.
Spot Support Without Rebuilding
For extra wobbly tables that still see daily use, slip felt pads between tabletop and apron, or between stretcher and leg. These invisible supports absorb tiny movements while preventing visible changes to the table’s structure.
Secure pads using minimal temporary adhesive, checking that removal won’t damage the finish. If the table’s sentimental value outweighs functionality, rotate pads and shims regularly instead of commit to permanent re-assembly.
If your attempts reduce wobble but can’t eliminate it without drilling or invasive changes, accept micro-adjustments for vintage pieces—preservation matters more than perfection, especially when continuing family traditions.
Frequently Asked Questions
What’s the fastest way to fix a wobbly table before guests arrive?
Wedge a folded napkin, piece of cardboard, or rubber pad under the shortest leg. This quick fix stops rocking instantly and buys you time for a long-term repair without tools or fuss.
Can I fix a wobbly table if I rent or can’t drill into furniture?
Absolutely. Use adhesive shims or soft rubber pads under legs. Adjustable, tool-free levelers work well and are removable when you move, leaving no marks on your rental or furniture.
Why does my table stay wobbly even after I’ve tightened everything?
This points to an uneven floor or warped tabletop. Place a level across the surface and test each leg on different spots. Use thicker pads, shims, or adjustable feet to correct this persistent cause.
Are glue repairs enough for wooden tables, or should I use hardware too?
Glue repairs strengthen most wood joints, but add brackets or screws for tables frequently moved or bearing heavy loads. For heirlooms, match repair methods to original joinery and use discretion with extra hardware.
How can I minimize wobble in a table with metal legs?
Explore threaded feet or screw-on rubber bumpers for micro-adjustments. If holes in legs have widened, use epoxy or wood dowels to fill gaps before reinstalling screws or bolts for a firmer result.