That annoying rattle or relentless hum above your head can easily turn relaxation into irritation, especially when the ceiling fan disrupts what should be a calm evening in your favorite space.
Persistent ceiling fan noise makes it tough to focus, sleep, or have a conversation. Addressing these disruptions helps your home feel more restful while preventing small issues from growing into costly repairs.
Dive into this guide to discover practical ceiling fan tips and straightforward fixes, ensuring a quieter, more comfortable living space. Every recommendation comes with step-by-step actions you can actually use today.
Pinpointing the Source of Unwanted Fan Sounds for Accurate Fixes
Tackling a noisy ceiling fan begins with identifying the exact source of the problem. You’ll save time and trouble with a step-by-step approach right from the start.
Listen for the sound’s qualities—does it click, hum, or wobble? Observing closely lets you take direct action, targeting loose screws, unbalanced blades, or faulty mounts for concrete solutions.
Distinguishing Between Rattles and Hum: What Your Ears Tell You
A rattling noise typically hints at loose metal parts or screws. Stand underneath while the fan is running and try to locate the source.
If you notice a repetitive ticking every rotation, focus on the blade mounts or the light kit. This sharp sound emerges from shifting hardware rather than electrical faults.
A persistent hum, on the other hand, signals possible motor issues or vibration against the ceiling. Such baseline sounds often require examining both mounting brackets and motor housing for tightness.
Visual Clues That Speed Up Diagnosis: Pay Attention to Movement
Watch the ceiling fan as it spins at various speeds. Wobbling blades or a swaying motor tell you balance and alignment need attention.
If you see dust trails spinning off—especially unevenly distributed—it’s a clue that cleaning and rebalancing could help. Blades out of alignment force the fan to work harder and create more noise.
Frequent flickering of attached lights points to vibrations in the assembly or loosening sockets. Tighten all visible fasteners to stabilize the setup quickly.
| Noise Type | Likely Cause | Simple Fix | Next Step |
|---|---|---|---|
| Clicking | Loose blade screws | Tighten screws | Check again after running |
| Rattling | Mounting bracket loose | Tighten mounting hardware | Test at all speeds |
| Humming | Motor or vibration | Inspect motor housing | Add rubber spacers |
| Wobbling | Imbalance or bent blades | Balance blades | Replace if bent |
| Squeaking | Lack of lubrication | Lubricate moving parts | Monitor for recurrence |
Implementing Everyday Fixes That Stop Ceiling Fan Noise Fast
Before calling for help, try everyday fixes that directly address your ceiling fan’s most common sound problems. These steps empower you to restore quiet with minimal tools and moderate effort.
Clearing dust and debris is one crucial step. Dirty blades throw your fan off balance, leading to vibrations, rattling, and groaning sounds at every speed setting.
Routine Cleaning: Less Dust, Less Noise
Wipe blades with a microfiber cloth every month to prevent buildup. This simple action keeps your ceiling fan running efficiently and reduces random squeaks from excessive vibration.
- Turn off power at the switch for safety before cleaning the ceiling fan. Never clean moving blades to avoid personal injury.
- Position a step stool to reach all blades comfortably, ensuring you can see both the top and bottom sides as you work.
- Spray your microfiber cloth lightly with gentle cleaner. Direct contact with the fan’s electrical components should be avoided, preserving fan function.
- Pay special attention to blade edges, where gunk accumulates. Extra dust here throws the fan off balance, meaning more noise at higher settings.
- Rotate blades gently by hand to check for play or wobble. Spotting loose screws during cleaning saves you a second round of fixes later.
As an analogy, think of your ceiling fan like an unbalanced bicycle wheel—a slightly uneven rim makes the whole ride bumpy. Keeping everything clean reduces both stress and uneven movement.
Quick Tune-Ups: Fasteners and Mounts
Every three months, assess all visible fasteners along the fan base, bracket, and blade holders. Tighten anything with a Phillips head screwdriver.
- Check the canopy cover for movement. If you can wiggle it, realign and retighten the screws holding it to the bracket.
- Inspect all blade holders, running your fingers along each screw. If they twist even a little, tighten them firmly by hand, then with a screwdriver.
- Look for play in the downrod connection. A secure fit prevents swaying and keeps the fan silent at higher speeds and reduces strain on the ceiling.
- Retest the fan by gently spinning it. Any remnants of clicking or rattling may point to screws inside the motor housing needing attention.
- Write down your tune-up steps and results. This checklist makes troubleshooting much easier for next time and helps identify persistent or returning problems.
Quick tune-ups should take only a few minutes but offer significant returns in comfort and peace of mind. Always handle metal parts with care to avoid stripped screws.
Aligning and Rebalancing Blades for Whisper-Quiet Operation
Blade alignment ensures your ceiling fan performs quietly at all speeds. Poor blade balance creates vibration, wobble, and clicking noises that can be fixed with a simple home process.
Balance kits or common household items, such as coins or small washers, help correct minor differences in blade weight, restoring smooth operation for every ceiling fan.
Using a Blade Balancing Kit for Precision
Start with the fan off and completely stopped. Attach the balancing clip from the kit midway along one blade, then power the fan on at low speed.
If the ceiling fan noise improves, add a weight to the blade in the same spot. If not, repeat with the other blades until the sound is minimized or eliminated.
Secure the weight using supplied adhesive. Remove the clip and check again—repeat as needed for all blades, focusing on those most out of line when visually inspected.
DIY Coin Balancing: A Quick Fix Anyone Can Try
Address minor imbalance by taping a small coin onto the top center of a noisy blade. Run the fan and listen for changes in sound or wobble.
If the noise shifts, experiment with different coins or placement distances until you reach a noticeably quieter result—always use tape that won’t damage blade finish.
Remove coins after confirming balance with a kit or professional, as this is best as a temporary or diagnostic aid in the pursuit of peace and quiet.
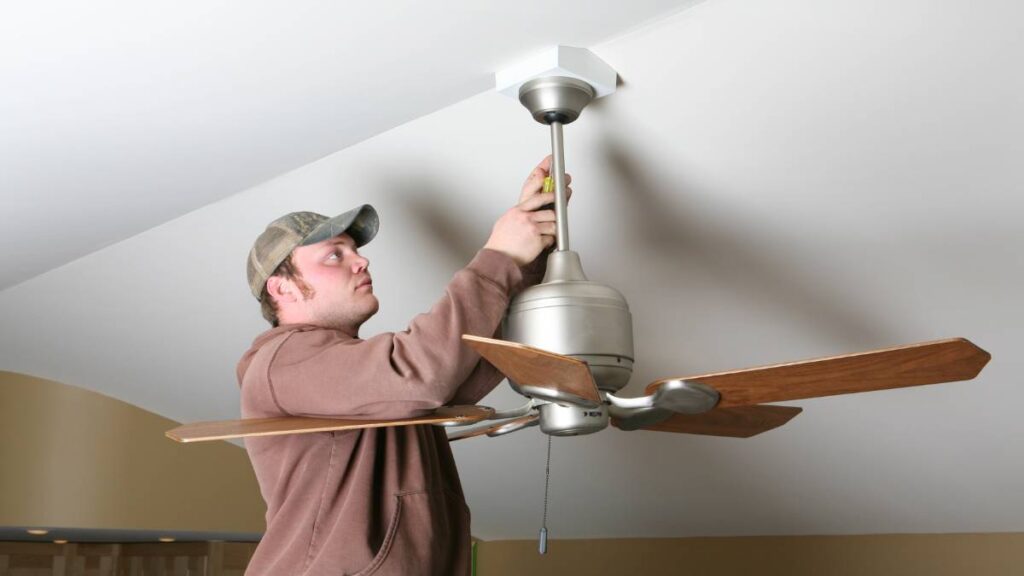
Securing and Lubricating the Motor Assembly for Silent Spinning
The motor is the heart of every ceiling fan. With regular care, you keep unwanted sounds away and extend the life and efficiency of your fan.
Adding a few drops of light machine oil to accessible bearings eliminates squeaks caused by friction, while securing the motor housing prevents irritating vibration and hum.
Targeted Lubrication for Moving Parts
After disconnecting power, find the oil hole or remove the light kit for direct access to the bearings. Apply only a few drops—excess oil attracts dirt.
Spin the blades manually to distribute oil evenly. Wipe away drips when done, keeping ceiling fan parts dry and clean.
Power the fan on and listen. If squeaks fade, you’ve likely addressed the cause without costly interventions. If not, try reapplying after another week.
Double-Checking Motor Mount Stability
Inspect the bracket and support plate for movement while the fan is off. Movement at the base amplifies every sound the fan makes when operating at low or high speeds.
Tighten bolts with the proper wrench or pliers as needed, checking visually for any separation between the ceiling and mount.
Stable mounts keep both the ceiling and ceiling fan safe, preventing cracks above and ensuring a pleasant, noise-free environment for years to come.
Fine-Tuning Accessories and Attachments for Minimal Fan Disruption
Ceiling fans with light kits, pull chains, or decorative pieces are prone to extra noises. Securing or adjusting these adds up to a much quieter overall operation at every setting.
Carefully tighten glass shades and inspect accessories to spot loose or vibrating parts. Quick fixes for these attachments dramatically lower noise without much effort.
Pull Chains and Shades: Keeping Attachments in Check
If chains clang or ring, shorten with a link or secure against the fan body using a soft adhesive pad. Prevent pulling by accident during cleaning or use.
Light shades that rattle often need only slightly tighter screws. Use only hand pressure, as overtightening risks damaging thin glass or metal trim.
Test again with the fan on. If you hear remaining noises from accessories, revisit connections or consider rubber washers to isolate vibrations.
Balancing Aesthetic and Practical Needs
Blending quiet function with room style sometimes means replacing heavy glass or metal accents with lighter alternatives. Pick airflow-friendly designs for best ceiling fan performance and minimal sound.
Consider removing seldom-used pieces. Simplifying attachments cuts down on trouble spots and lets you enjoy the fan’s intended silence.
Always keep spare parts on hand for quick swaps—the right piece at the right time saves repair headaches down the road.
Knowing When Replacement or Upgrades Offer Better Value
Older or poorly maintained ceiling fans eventually make noise that fixes can’t resolve. Investing in a new, well-built fan or improved blades delivers lasting silence and boosts home comfort.
Modern models are designed with quiet operation in mind. If repairs regularly fail, a smart upgrade is the most effective micro lifestyle skill for peace at home.
Comparing Repair Versus Replacement Costs
Weighing the cost of parts and your time against the price of a new fan clarifies the best approach. Quality ceiling fans last years with low-maintenance routines.
Evaluate warranty coverage before repairs. Replacing under warranty can save you both cash and time while delivering better reliability long term.
If your ceiling fan struggles with speed changes or overheating, it’s time for a new unit—choose a quiet-rated model for future-proof comfort.
Enjoying Restful Spaces: The Real Rewards of a Quieter Home
Silencing a noisy ceiling fan goes beyond just fixing a sound—it means reclaiming peaceful evenings, uninterrupted sleep, and stress-free conversations.
Tackling ceiling fan noise empowers you to preserve your comfort, budget, and well-being. These micro lifestyle skills invite simpler, more intentional daily routines.
Keep your tools handy and make regular checkups part of caring for your ceiling fan. Small, consistent actions deliver years of restful quiet in every room.
Frequently Asked Questions
What’s the safest way to clean my ceiling fan if I have high ceilings?
Use an extendable duster and a secure ladder. Keep the fan off and stable before starting. If possible, get a helper to assist or spot the ladder for added safety.
Are household oils safe for lubricating my fan motor?
Only use light machine oil without detergents for motor bearings. Avoid heavy oils or spray lubricants, which can hold dust and shorten ceiling fan lifespan. Check your manual for approved products.
Can I use super glue to stop vibrating glass shades or screws?
Avoid using glue, as it makes future removal difficult and may damage parts. Instead, secure with properly sized rubber or plastic washers for controlled, removable sound isolation.
How often should I rebalance the blades?
Check blade balance annually, or any time you hear new wobbling or clicking. Dust accumulation, ceiling settlement, or accidental bumps can all throw off the blades, even in well-maintained fans.
When is it best to replace a noisy ceiling fan instead of repairing it?
Replace any fan with persistent humming, frequent shutdowns, or visible damage after attempted fixes. Modern quiet-rated fans are worth considering when repairs cost more than half the price of a new unit.