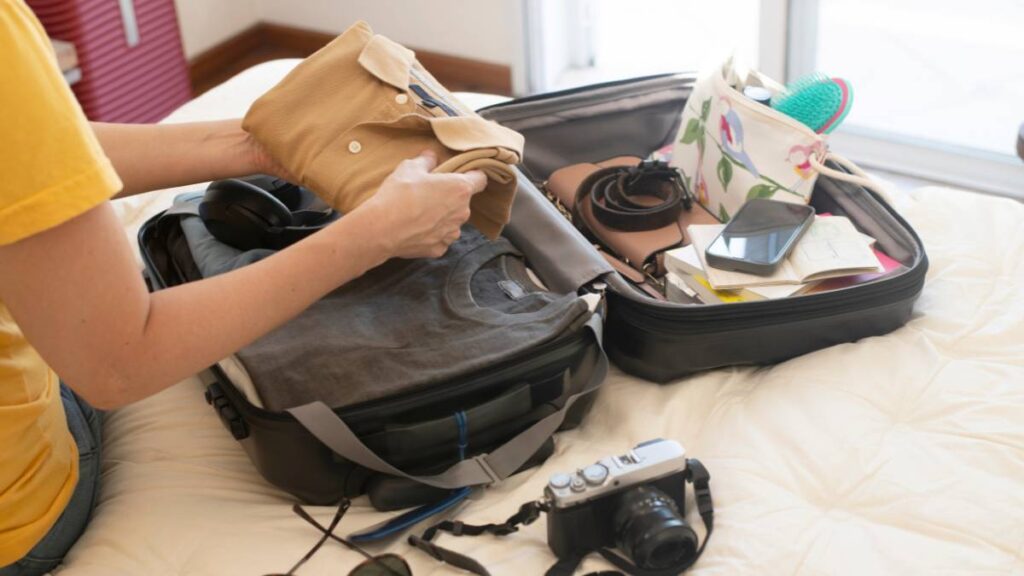
Long lines, unfamiliar procedures, and the stress of making a flight make travelers dread airport security. Yet, small micro lifestyle skills learned through experience can smooth this entire process, saving time and energy. Instead of just enduring the airport security maze, you can actively shape a simple, more predictable passage every trip.
Airport security matters for anyone wishing to travel efficiently, whether for work or adventure. It’s not just regulations; it’s about moving confidently. When you know what to expect at airport security checkpoints, you’ll notice your stress drop and your focus return to the excitement of the journey.
This guide breaks airport security into practical steps, with tested micro skills you can use each time you fly. As you read, look for the actions, scripts, and checklists you can copy for your upcoming trip to improve efficiency and reduce hassle.
Applying the 3-Bin Rule for Speedier Checkpoint Flow
Choosing and using bins at airport security correctly cuts your checkpoint time. The three-bin rule keeps your items organized while matching TSA expectations for quicker movement through screening.
When you arrive at the conveyor, place belts, shoes, and jackets in the first bin, then electronics in a second, and finally liquids or miscellaneous items in the third. This lets TSA officers view your belongings easily, and you retrieve them in sequence without confusion.
Understand What Belongs in Each Bin
Your first bin should include loose accessories: wallet, keys, belt, phone, coins. This prevents small items from getting lost or forgotten. Place it first so you can quickly dress after passing through screening.
The second bin is dedicated to electronics, like laptops, tablets, and e-readers. Lay them flat and separate from cases or cords to ensure unobstructed x-ray imaging, reducing questioning and secondary inspection.
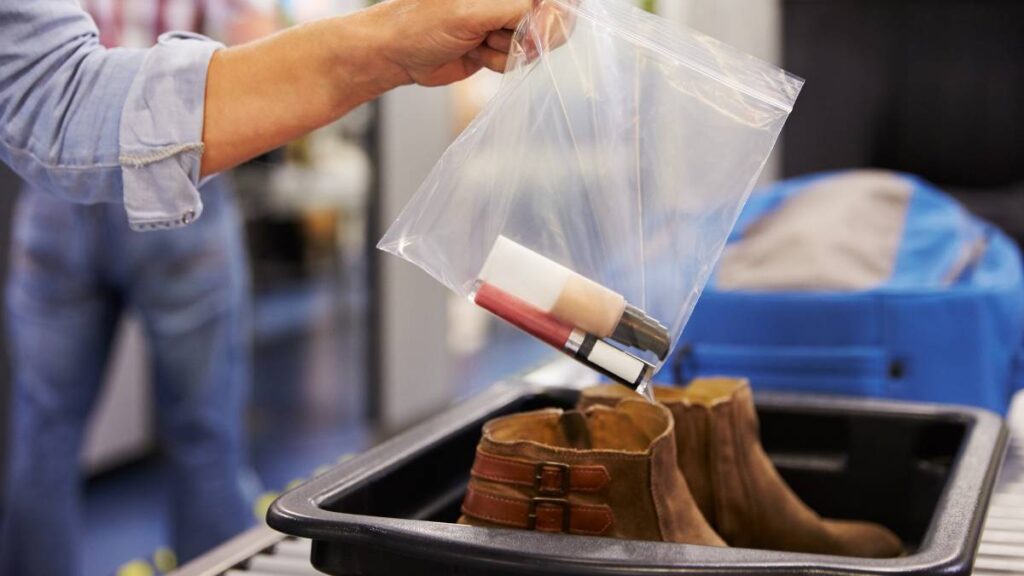
In the third bin, store liquids, gels, and pastes in clear quart-size bags. FDA and TSA regulations permit up to 3.4 ounces per item, so pack accordingly. Storing these separately avoids delays caused by manual bag searches.
Example: Efficient Bin Loading Sequence
Imagine you’re at the conveyor. After de-shouldering your backpack, move purposefully: first, drop accessories; next, remove your laptop for the electronics bin; finally, place your liquid pouch in the third bin.
Rehearse this at home before travel. For instance, say aloud, “Bin one—belt and wallet; bin two—laptop; bin three—toiletries.” Being deliberate makes this process muscle memory by the second trip.
After screening, reverse the steps: grab accessories and redress while the rest of your items follow, keeping the line moving for everyone behind you. TSA staff appreciate prepared travelers—the smoother your process, the smoother everyone’s experience.
| Item Category | Sample Items | Screening Requirement | Action Step |
|---|---|---|---|
| Accessories | Keys, Belt, Phone | Must remove | Place all in first bin for quick pickup |
| Electronics | Laptop, Tablet, Camera | Separate bin, uncovered | Lay flat, easily accessible |
| Liquids | Toothpaste, Lotion | 3.4oz max, clear bag | Have in hand, top of bin |
| Outerwear | Jacket, Hat | Remove and scan | Stack in first bin, on top |
| Carry-On | Books, Snacks | Stays inside bag if compliant | Ensure zipper is closed |
Prepping at Home: Small Habits That Avoid Hold-Ups
Setting yourself up before you arrive gives you power over how smoothly airport security goes. Focus on organizing and prepping your bag, pockets, and documents at home so nothing surprises you at the checkpoint.
Packing with airport security in mind means separating liquids, packing snacks in clear bags, and stashing all metal objects together for rapid unloading. This avoids scrambling under pressure and keeps you confident under the watchful eyes of TSA agents.
Build a Home Pre-Security Staging Routine
Before any flight, spend five minutes reviewing your pockets and bag. Say, “Everything metal and loose—move to zipper pouch. Electronics, top of bag, easy grab. Toiletries—plastic bag, outside pocket.”
- Remove all metal from pockets and group these items together the night before to avoid last-minute delays while undressing at the conveyor.
- Arrange your laptop or tablet in an outside compartment. That way, you can remove it in one smooth motion instead of searching through clothes or cords.
- Pack your clear liquid bag in an outer pocket, never buried deep. When it’s time to display, pull it out without opening your whole bag in public.
- Keep your ID and boarding pass in a secure, easily reachable sleeve. When asked, you’ll hand them over without rummaging or holding up the line.
- Run a mental checklist aloud—“ID? Liquids? Laptop? Metal?”—before zipping up. Familiarity sets your mind at ease and shortens the process under real checkpoint scrutiny.
After prepping, double-check by walking through your travel routine as if narrating steps for a friend. This practical rehearsal squashes surprises on departure day.
Micro Organization for the Departure Morning
On the travel morning, pack all the grouped items into the same pouch or pocket. This keeps you from scattering things when the bins arrive, and ensures nothing’s forgotten at airport security.
- Consolidate all small electronics in a zipper bag—no tangled cords, no stray earbuds caught on straps.
- Wear easy-off shoes, like slip-ons. You won’t need to struggle in line, and you’ll avoid dirtying socks on the airport floor.
- Layer clothing so that required removals (like jackets or sweaters) come off in one move, rather than getting snagged or needing to undress fully.
- If you wear a watch, choose one that’s plastic or composite to reduce the likelihood it will set off detectors.
- Leave jewelry at home or pack it deep in your carry-on until after screening. Metal detectors don’t mix well with rings and necklaces.
This attention to detail frees you to focus on travel instead of troubleshooting your outfit at the last minute.
Choosing the Right Lane: Fast Track vs. Regular Lines
Deciding which airport security line to join pays off by saving precious minutes—sometimes even catching a flight you might have missed. Learn to assess which lane is best just by looking.
Travelers who search for fast track, TSA PreCheck, or priority security lines receive streamlined screening. These lanes usually require less disrobing, let you leave shoes on, and have fewer rules for electronics, meaning speedier handling overall.
Fast Track Versus Standard Lanes in Real Time
Watch body language and behavior to pick your best lane. Fast track lines will have business travelers returning laptops to bags, not removing shoes, and holding their IDs forward for scanning.
If you see slowdowns from complicated bags, kids unpacking toys, or multiple trays of cosmetics, expect regular lines to move slower. Choose a lane where the travelers in front seem experienced and lightly packed.
If all lanes look long, prioritize families in front over solo travelers. Solo travelers tend to move faster—they aren’t juggling strollers, paperwork, or children needing extra instruction.
Lane Scripts: What to Say and Do
If asked, “Are you TSA PreCheck?” respond confidently: “No, regular screening, but ready to go.” For fast-track lines, say, “I’ve got my ID and boarding pass out. Anything else you need?”
Don’t debate rules with agents. Instead, ask for instructions: “What do you need from me?” or “Which items out?” This approach makes you a partner, not an obstacle, in the process.
After screening, thank agents with, “Appreciate it.” A little respect and active engagement go a long way in making your airport security experience—and theirs—much smoother.
Building an On-the-Go Pocket Routine for Security
Creating a pocket routine gives you command over every checkpoint. Efficient airport security starts before the trays when you pre-arrange pockets for stress-free unloading and repacking.
Think of your pockets as dedicated compartments. Each one earns its task: front left pocket for ID and documents, front right for keys and coins, back pocket empty or reserved for a boarding pass only after screening.
Pocket Mapping Scenario
On a typical travel day, tell yourself, “Front left—ID, nothing else; front right—phone and wallet only; back pockets clear.” Mentally rehearse these assignments before leaving for the airport.
If a detector signals, grab the mapped pocket, remove all items, and show them to the agent with an open palm. No fumbling or forgotten change. This small action saves time and keeps the process non confrontational.
After clearing airport security, reload pockets in reverse order: boarding pass and ID first, then wallets and phones. This approach makes the transition from checkpoint to gate smooth and interruption-free.
Maintaining Consistency After Screening
Commit to this pocket routine on every trip for automatic efficiency. Efficiency is a result of repetition and conscious mapping, not just a lucky morning.
Say, “ID out, pockets clear,” while walking to the checkpoint. This self-cueing keeps your mind focused on the task and discourages distractions like answering texts or checking emails while moving through airport security.
When grabbing items from bins, follow your order—don’t swap pockets. Consistency is key, especially if running late or handling bags at the same time. The less you have to think, the easier it is to stay on track.
Making the Most of Airport Security Wait Time
While waiting in line at airport security, use the time to double-check your process. Confirm you’ve prepped pockets, removed metal, and have your ID at the ready so you’re not surprised at the front.
Take slow, deliberate breaths as you approach the conveyor. Consider this a mini-meditation; nervous travelers tend to forget belongings and rush, but a calm pace improves recall and the screening itself.
Mental Checklist for In-Line Preparation
Say to yourself, “Metal removed, laptop accessible, liquids on top.” Visualizing these steps primes you to perform them quickly when your turn comes. This heads-off bottlenecks and keeps you visibly prepared.
Survey the travelers ahead for cues. If someone slows the line removing shoes, use the time to gather your own items. Think of each pause as a chance to get one step closer to readiness.
Never argue with airport security about rules; if corrected, accept the instruction and move along. Your cooperation ensures a better experience for everyone in line—and sometimes, a few words of thanks help you receive the same respect in return.
Practicing Carry-On Organization for Consistently Quick Passes
Carry-on organization can turn every airport security experience from a stressor into a routine. The key is grouping items for fast access, and never burying anything needed at screening deep in your luggage.
Arrange your carry-on in “layers” with required items like laptops and liquid bags at the top. This allows you to pull them out without exposing clothes or disrupting the rest of your packing system.
The Layering Technique for Streamlined Access
Before leaving, practice the sequence: unzip, grab electronics, set on conveyor. Test how easily your hand finds each item. If you fumble the bag, reorganize until it feels natural.
Use packing cubes to keep clothes together and leave screening items in a separate pouch or mesh bag at the top of your carry-on. This limits confusion for both you and airport security screeners.
At the table, only unzip the area you need—don’t open every compartment. This shows you came prepared, and helps you repack bins swiftly without clogging the repacking area.
Snack Management: Keep Food Visible
Airport security prefers clear snacks. Pre-pack food in transparent bags, keeping each item visible for easy inspection. Place these at the top or dedicate a small side pocket.
Say, “Snacks, front pocket, no hidden foods.” This tells agents you’re aware of guidelines and puts them at ease. Hidden food sometimes invites secondary searches that add unnecessary minutes to your checkpoint time.
Be ready to discard water bottles before you reach screening. Many airports have fountains after security, so traveling with an empty bottle saves money and prevents waste, too.
Summary: Turning Micro Skills into Travel Wins
Speed and confidence through airport security rely on mindful practice. You’ve seen how the three-bin rule, smart pocket mapping, and smart packing can all create a seamless experience. When repeated, these skills become second nature.
Airport security isn’t just a hurdle; it’s a great place to hone micro lifestyle skills you’ll use on every trip. Each step, from prepping at home to organizing on-the-go, builds your confidence and saves real time.
Apply these actions, scripts, and mental checklists during your next flight. Before long, you’ll notice other travelers eyeing your calm, collected approach—and maybe even asking for advice on their own passage through airport security.
Frequently Asked Questions
What’s the fastest way to prepare for airport security on a busy travel day?
Group your belongings at home into easy-access categories: electronics, liquids, and IDs should be most accessible. Practice a bin sequence before travel. This eliminates awkward pauses and guarantees nothing gets left behind—or holds up others at the checkpoint.
Do all electronics need to be removed every time at airport security?
Large electronics like laptops must usually come out, but tablets can sometimes remain inside bags, depending on signage. Always check for airport-specific rules, and be prepared to quickly remove any device if asked by screeners.
Can I bring snacks through airport security?
Yes, non-liquid snacks are allowed through airport security, but pack them in transparent bags to speed up the process. Opaque packaging or hidden food may require further inspection and delay your line, so plan to keep everything visible.
Is TSA PreCheck always worth it?
TSA PreCheck accelerates the security process if you travel at least several times a year. It streamlines requirements (shoes, laptops, liquids), but not every airport supports it at all checkpoints. Assess your travel frequency and main airports for value.
What’s the best way to stay calm while waiting in line at airport security?
Use the waiting time for mental rehearsal and pocket checks, rather than worrying. Take deep, slow breaths, and run through your own checklist (“ID out, shoes easy-off, bins ready”) as a rhythm to keep nerves in check and your routine sharp.