Shaving can feel like a quick confidence boost until red bumps start cropping up. Small tweaks can help you prevent razor bumps and keep your skin calm after every shave.
Many people experience skin irritation because of rushed routines or skipped steps. Addressing these habits has a real impact and benefits anyone who wants a smooth finish.
Read on for practical ways you can adjust your daily shave and break free from irritation. Simple, evidence-backed strategies await, so let’s dig in together.
Adopt Proven Prep Steps for Noticeably Smoother Shaves
Every close, comfortable shave begins with solid preparation. Neglecting these steps leaves skin vulnerable. A few extra minutes now will help prevent razor bumps later on.
Run warm water over your face for at least two minutes before you begin. This softens both hair and skin, making every razor stroke count.
Choose the Right Cleanser for Your Skin Type
Use a mild, unscented facial cleanser; avoid harsh scrubs right before shaving. This cleans away dirt without stripping away hydration and supports efforts to prevent razor bumps anytime.
Foaming cleansers can leave some skin types feeling tight. For those individuals, a moisturizing gel or cream formula proves gentler and more protective.
Pat your face dry with a soft towel, using gentle, downward motions instead of rubbing. Leaving the skin slightly damp ensures better glide for your razor.
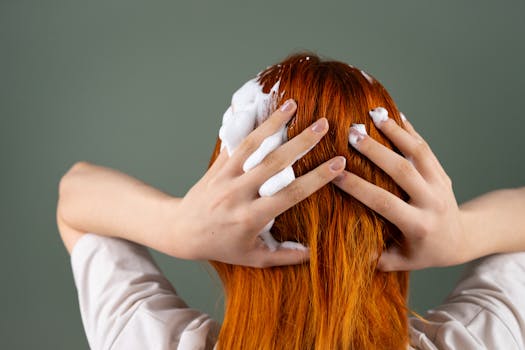
Soften Hair with a Warm Compress
Pressing a warm, wet washcloth against your beard or legs for 90 seconds opens pores and softens hair, defending against prevent razor bumps as you shave.
This little step mimics the relaxation of a traditional barber’s towel wrap. It feels luxurious and prepares your face for fewer nicks and ingrown hairs.
If you’re rushed, a warm shower right before shaving has the same effect. Either way, always work with properly softened hair for best results.
| Prep Method | Time Required | Skin Sensitivity | Takeaway |
|---|---|---|---|
| Warm shower | 5 minutes | All types | Quick, effective prep—softens hair for a smoother outcome |
| Gel cleanser | 1 minute | Dry/sensitive | Gentle and hydrating pre-shave cleaning |
| Foaming cleanser | 1 minute | Oily/normal | Effective for removing oil and buildup |
| Warm towel compress | 2 minutes | All types | Relaxes hair and helps open pores. |
| Exfoliation (day before) | 1 minute | All but sensitive | Removes dead skin; don’t do same day to prevent razor bumps. |
Swap Out Tools and Products to Reduce Irritation
Upgrading your razor and shaving products streamlines the process and limits the risk of bumps. Replace blades regularly for efficient cutting and cleaner results.
Single-blade razors and sharp, clean cartridges minimize drag. Product formulas matter; swapping to sensitive-skin foams and gels makes a real difference.
Pick Blades Designed for Sensitive Skins
Multi-blade razors tug hairs beneath the surface, causing more ingrowns. Choose single-blade or safety razors marked “gentle” or “for sensitive skin” for safer shaves.
Inspect each blade before use. Dull or rusty razors create uneven surfaces and micro-abrasions, which can trigger bumps even in those who rarely have trouble.
- Change razor blades every five shaves to maintain a sharper edge, decrease friction, and ensure you prevent razor bumps after every shave.
- Disinfect your blade using a quick dip in alcohol before each use, which kills bacteria and supports clearer, bump-free skin.
- Only share razors between shaves if you’re also replacing blades, as old or shared blades carry bacteria that directly undermine your attempts to prevent razor bumps.
- Always store razors upright, out of the shower, to reduce corrosion and dulling—rust leads to harsh shaves and increased irritation risks.
- Try an electric razor for sensitive areas if manual shaving hasn’t helped you prevent razor bumps, as the guarded blade can be gentler on delicate skin.
Shaving foam and gel types also impact results. Look for non-comedogenic formulas made for sensitive skin for better performance every session.
Always Use Fresh, Protective Lubrication
Apply a generous layer of shaving cream or gel, then wait 30 seconds before starting. This soaks hairs, letting the razor glide smoothly—key to prevent razor bumps.
Using too little product increases drag. Consider a brush to lift and coat each hair evenly. Don’t settle for a thin, spotty application—quantity counts here.
- Use fragrance-free shaving gels for facial skin; perfumes can cause irritation and undermine the effort to prevent razor bumps after each shave.
- Switch to aloe- or oat-based creams for legs, arms, or more delicate areas, as these ingredients hydrate and calm skin on contact.
- Beware thick lathers with lots of bubbles; sometimes these form barriers rather than aiding glide and can leave patches at higher risk for bumps.
- Include pre-shave oils if your hair is coarse. Massage a few drops in before your cream to add slickness and lower the risk of hair breakage.
- Test a patch before adopting a new product. Sensitive users prevent razor bumps by ensuring no formulas trigger redness or tingling on their inner arm first.
Experiment to find the right cream for your skin. Each swap counts; the right protective layer prevents stinging, redness, and post-shave bumps.
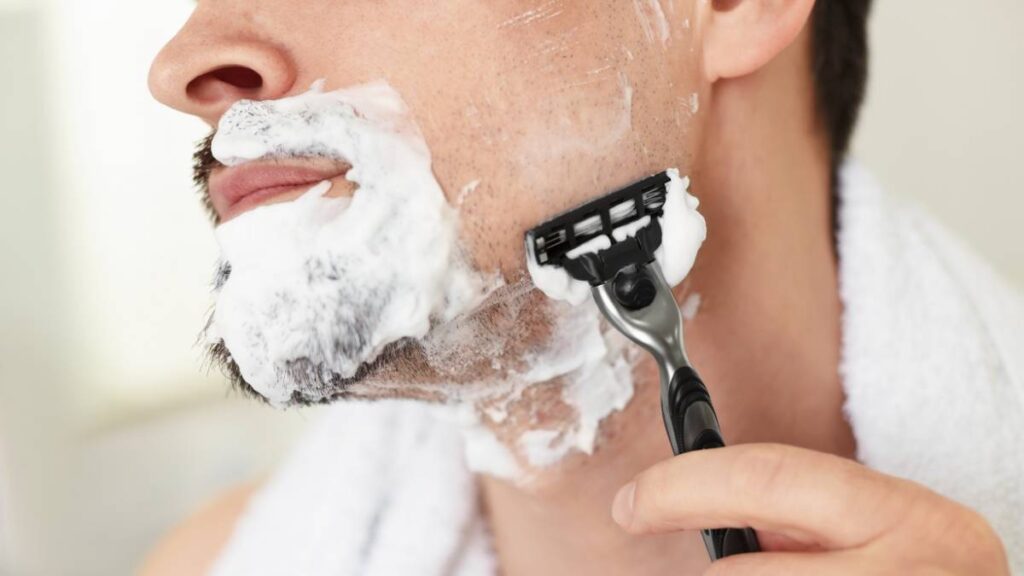
Perfect Your Shaving Motions for Consistently Smoother Results
Confident, gentle strokes beat speed every time. The aim is steady pressure and short, efficient motions that let you prevent razor bumps as a reliable habit.
Glide the razor with the grain of hair growth, not against it. This technique reduces irritation and the chance of hairs curling back into the skin.
Refine Angle and Pressure Habits
Keep the razor at a 30-degree angle. This maximizes contact while avoiding digging, ensuring you shave closures without scraping or wounding delicate barriers.
Light, even pressure means a single pass will remove hair without extra friction. Pressing harder doesn’t get a closer shave; it increases micro-tears in skin.
Wipe the blade clean with each pass to clear hair and cream. This maintains a sharp cutting edge, so each stroke removes hair instead of pushing it down.
Divide Shave Areas into Small Sections
Shave one cheek or calf at a time before moving on. Working in manageable areas lets you stay intentional and maintain ideal razor angles throughout.
Rinse the razor after every few strokes, especially in dense areas. This tactic prevents buildup and maintains precision, further aiding your effort to prevent razor bumps.
Saving the upper lip or knee for last, when the cream has had more time to soften hair, can also reduce post-shave irritation.
Lock in Moisture and Soothe Your Skin After Shaving
Once you’ve finished shaving, the right aftercare locks in moisture and soothes sensitive patches. Immediate attention prevents razor bumps before redness starts.
Rinse with cool water to reduce swelling and seal pores. Gently pat, don’t rub, your face or legs dry with a fresh towel.
Follow a Simple Post-Shave Care Sequence
Apply an alcohol-free toner after rinsing. This step rebalances skin pH and minimizes inflammation—key moves to prevent razor bumps from forming hours later.
Select soothing gels with aloe vera, witch hazel, or allantoin. These calm the skin barrier and deliver fast, visible comfort after every single shave.
As an analogy, think of aftershave care like watering a garden just after planting seeds. Your skin stays “hydrated” and ready to heal with less risk of irritation.
Hydrate and Protect With Lightweight Moisturizers
Lock in moisture using a fragrance-free, lightweight lotion or gel. Heavy creams can clog pores and contribute to bumps, especially in humid conditions.
Apply in upward motions, covering all shaved areas. Some lotions include added SPF, which doubles the benefit—protecting fresh skin while helping you prevent razor bumps daily.
Resist the urge to scratch or touch shaved areas. Keeping your hands off preserves your hard preventative work and maintains a smoother outcome.
Stay Ahead with Weekly Habits to Reduce Razor Bump Risk
Building a consistent self-care routine helps reduce the frequency and severity of razor bumps over time. Weekly actions combine for lasting results.
Add exfoliation once or twice per week. This step sloughs away dead skin cells while freeing trapped hairs—an essential move to prevent razor bumps long-term.
Pair Exfoliation with Targeted Spot Treatments
Use gentle scrubs or chemical exfoliants formulated for faces or bodies. Scrubs should use rounded beads to avoid tearing skin; never choose sharp, irregular exfoliants.
Apply spot treatments containing salicylic acid or tea tree oil right when you notice irritation. These ingredients decrease inflammation and speed up recovery without over-drying your skin.
If you’ve ever felt frustrated about recurring bumps, tweak your weekly routine with these two targeted boosts. You’ll see positive changes within two shave cycles.
Keep Tools Clean and Replace Them Routinely
Set a reminder to rinse razors in boiling water for one minute weekly. This thorough step clears hidden gunk and extends your tool’s safe use-time between changes.
Dry your razor on a clean cloth before putting away. Humidity invites bacteria and rust—two silent causes of most prevent razor bumps cases found in home routines.
Replace your razor monthly even if it seems sharp. Freshness counts; overused blades dull and stress the skin, undermining prevention efforts.
Recognize and Respond to Early Signs of Razor Bumps
Noticing warning signs lets you act before bumps develop fully. Redness, itching, or swelling means it’s time to adjust your approach and reinforce your care habits.
When irritation appears, pause shaving that area for a day or two. Hands-off time supports natural healing, reducing the chance that mild redness turns into prevent razor bumps trouble spots.
Apply Gentle Compresses and Calming Remedies
Dab a clean, cool compress on affected areas for five minutes at a time. This instantly reduces itching and calms inflamed follicles.
Try dabbing a few drops of witch hazel or cold aloe gel twice daily. Both have evidence-backed anti-inflammatory effects and work fast to minimize visible bumps.
Resist the urge to pick or squeeze irritated spots. Touching can introduce bacteria, delay healing, and increase the risk of long-term pigmentation or scarring.
Adjust Your Shaving Timeline to Break Cycles
If razor bumps keep coming back, shave less frequently. Space sessions by an extra day or two to give skin a real break between exposures.
When you resume, apply all adjustments outlined above. Notice which step brings relief and work it into your routine to keep prevent razor bumps as a priority.
Track symptoms in a calendar or notes app. Identifying patterns in your regimen transforms temporary fixes into lasting change, empowering you every time you reach for your razor.
Consistent Care for Lasting, Bump-Free Shaves
Making strategic, simple at-home adjustments transforms your shaving experience. Blending better prep, smart tool choices, excellent technique, and gentle aftercare means you can confidently prevent razor bumps.
Each step shared here builds toward lasting comfort. Regularly using the strategies, spot checks, and weekly habits keeps irritation away and skin healthy every time you shave.
By respecting your skin and practicing attentive, intentional care, smooth, bump-free results become your new normal. Every shave can feel comfortable and look great—no exceptions.