Torn seams crop up out of nowhere, making the trusted sewing kit that much more essential in daily life. Just picture the scramble: a button pops before a meeting, or a hem unravels right before a big event—a sewing kit solves these without a trip to the tailor.
Learning micro lifestyle skills like mending with a sewing kit is about practical independence. Tackling small fixes yourself not only saves time and money—it also builds real confidence for unpredictable moments in daily routines and travel.
This guide tackles everything from choosing the right sewing kit to quick repair techniques and handy rules of thumb for mastering common clothing mishaps on the spot. Dive in for skills you’ll use long after your first fix.
Building a Truly Useful Sewing Kit for Daily Mishaps
Knowing exactly which tools to pack ensures your sewing kit is ready for anything—a missing button, unsecured hem, or ripped seam can appear anytime. Here’s how to identify essentials and recognize when specialty items save the day.
Matching repairs to clothing type is just as crucial. Whether patching denim, tightening a bra strap, or fixing a silk blouse, your toolkit needs flexibility. The next sections deliver actionable micro-skills and cues about what to keep accessible.
Recognizing the Absolute Must-Haves
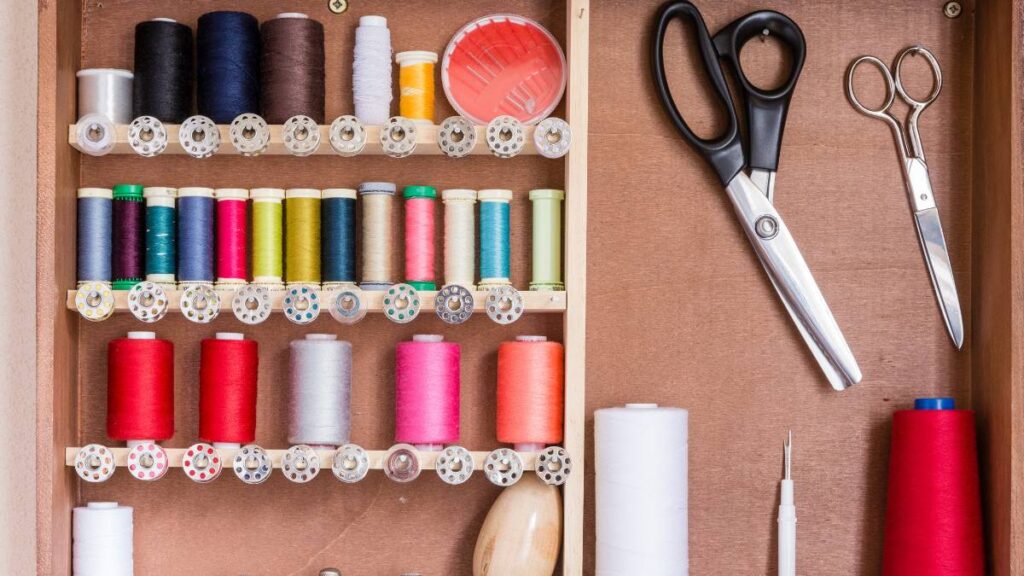
Guarantee you always carry at least three needles (various sizes), sharp scissors, and a threader for hassle-free fixes. These are non-negotiables for your basic sewing kit and guarantee that any emergency doesn’t become a wardrobe disaster.
Stock spools in black, white, and navy—most clothing colors can be matched closely enough with these shades for inconspicuous repairs. Add safety pins for quick fixes; they’re vital for securing rips until there’s time to sew properly.
Practical extras like a thimble save fingers during thick fabric work, while a measuring tape helps with precise hems. When you spot a missing button, scan your kit for replacements—attach one that’s closest in style, then reinforce with a cross-stitch.
Scenario: The Last-Minute Patch-Up Script
If you feel a rip as you sit down just minutes before leaving home, grab your sewing kit and follow this: Pull both torn sides taut, thread a needle, and use a whip stitch in small, tight movements.
Whip stitching works best for reinforcing frays. For thicker materials, switch to a backstitch pattern. After you’ve tied off the thread, tug gently to test the mend—a strong repair won’t gape or pull with basic movement in daily wear.
If a hem comes loose just as you’re heading to a job interview, use double-threaded running stitches to secure fabric quickly. Tie knots tightly but hide them inside for a clean result. It’s worth spending thirty seconds double-checking work for visible gaps.
| Item | Purpose | When to Use | Action Step |
|---|---|---|---|
| Sharp Needles | Pierce fabric cleanly | All sewing repairs | Choose size based on fabric weight and always have a spare |
| Threader | Assist threading needle | For fine threads or poor lighting | Pull thread through needle eye without fumbling |
| Assorted Threads | Color-matched repairs | Patch rips, secure buttons | Wrap excess thread safely after every use |
| Safety Pins | Temporary fixes | On the go or before sewing | Pin torn or gaping areas to prevent further damage |
| Mini Scissors | Trim threads and fabric | Every repair session | Keep scissors closed and sharp for precision cutting |
| Spare Buttons | Replace lost buttons | Shirts, jackets, pants | Keep various sizes; pick closest match for formal wear |
| Thimble | Finger protection | Heavy fabrics or repeated repairs | Slip over index finger for better leverage |
Packing Portable Kits and Storing Supplies Like a Pro
Every organized sewing kit starts with proper storage—messy corners mean lost needles or tangled thread. Prioritizing organization lets you grab what you need fast, especially in high-stress clothing emergencies.
Knowing how to pack a portable sewing kit ensures you’re never caught off-guard, whether for daily commutes, travel, or special events. Add time-saving tricks like roll-up organizers and labeled pockets for efficiency.
Customizing Your Own Grab-and-Go Kit
Start with a zippered pouch that fits easily in a work bag, carry-on, or glove compartment. Sort contents into mini bags: one for needles and pins, another for thread, and a third for buttons or specialty items.
- Place all needles together, point facing one direction, to prevent punctures and snags when you reach into your kit for a quick fix during transit.
- Wrap thread tightly around small bobbins or thread cards, then tuck these into side pockets for tangle-free storage and easy color selection in low light.
- Stash flat objects like measuring tape, needle threader, and mini scissors in a slim inner pocket; this arrangement stops poking edges and keeps each tool ready for immediate use.
- Keep a folded piece of felt or spare fabric inside as a makeshift pin cushion—it keeps needles secure and gives you a safe spot to rest them between uses.
- Choose a pouch made from sturdy materials like canvas or rigid plastic—these containers are less likely to spill or break when stuffed into backpacks or purses.
Every action step here cuts the time it takes to respond to a simple rip or missing button—always test your setup with a trial run on a mock emergency.
Taking Inventory and Refreshing the Kit Regularly
Inventory your sewing kit every two months. Discard bent or dull needles, empty thread spools, and dried-out fabric glue. Replace missing or worn items so your kit functions as intended during a real mishap.
- Remove any rusty or dulled scissors and replace with sharp ones, making tiny practice cuts to confirm effectiveness before storing back in your kit.
- Toss empty spools after winding off their last strand—then count and reorder colors you rely on most, such as neutral beige, navy, or black.
- Add new packs of safety pins and buttons, sorting them by type (shirt, jacket, decorative) into mini-sealed bags to avoid time spent searching during a rush repair.
- Test thread for fraying by giving a gentle tug; weak or unraveling threads should be replaced to avoid mid-fix breakage.
- Sanitize reusable pieces, especially after use on workout gear or stored in humid places; this prevents odors and makes repairs cleaner next time.
Completing this inventory in one go ensures that each time you open your sewing kit, it’s set up to resolve emergencies smoothly without added stress.
Execution Rules for Fast, Clean Clothing Repairs
A reliable routine delivers top results from your sewing kit in ten minutes or less. Execute every fix with clean steps to prevent further damage, fabric buckling, or crooked mends.
Sequence and attention matter. Training your hand for consistent tension and recognizing when to double-thread make all the difference.
Quick-Start Steps for Effective, Tidy Mending
Always anchor both fabric sides first—finger-press flat to align the edges, then use a pin or safety pin. Thread your needle fully, knotting the end for stability before you sew.
For all running stitches, measure each stitch against your fingernail for evenness, and aim for short, controlled movements. Double-thread if you feel the fabric pulling apart under gentle tugging between stitches.
Take a break after five stitches to check your progress for puckering or skipped areas—if you notice a mistake, backtrack two stitches and redo that section, pulling each pass snug without gathering fabric.
Rules for Button Attachment and Hemming in a Pinch
Position the button right over the original holes on the garment—if you can’t see them, line up with any visible thread remnants for accuracy. Hold the button firmly and start sewing from the inside to the outside for neatness.
For hems, turn the fabric in twice (about a quarter-inch each fold), then tuck the raw edge inside before pinning. Run the needle carefully through all layers, hiding knots and starts inside the hem for a smooth finish.
Try this script aloud as you sew: “Steady hand, tidy finish.” Speaking the process reminds your body to slow down and reinforces muscle memory, which leads to consistently tidy repairs even during high-stress situations.
Practical Everyday Uses Few People Consider
The sewing kit opens possibilities for micro repairs and daily life hacks outside of classic mending. These ideas shift it from a single-purpose tool to a lifestyle enhancer for anyone aiming to save time and hassle.
Add versatility to routines by keeping your sewing kit handy for fixes at work, when traveling, or supporting family and friends.
Impromptu Solutions for Kids, Work Events, and Travel
Children’s costumes snag easily during play; have your sewing kit ready for a ninja patch on Halloween or a last-minute fix for a school event. Mend torn superhero capes discreetly, helping kids keep their confidence intact without fuss.
For those tricky days when socks get holes at the toe, pull your kit out at your desk, slip off your shoe, and darn the hole with matching thread. A five-minute fix keeps socks wearable until laundry day.
In hotels or on the road, the difference between a frazzled morning and a confident appearance is a fast fix of a fallen hem or button using your travel set. These moments reduce stress and help you focus on your plans.
Creative Uses: Organizers, Luggage Tags, and Custom Fit Fixes
Use leftover fabric scraps and your sewing kit to make DIY organizers for small electronics or jewelry at home. Create personalized luggage tags by stitching initials onto reclaimed material and looping through suitcase handles.
For evening events where sleeve lengths matter, secure a quick tuck inside a jacket or blouse—catch the inside seam with a two-minute running stitch. Snip it out later, returning your garment to its original form without damage.
Keep the kit nearby for friends during group outings; offering a sewing kit for a shoe strap fix or wardrobe malfunction can turn you into the group’s “problem solver” on the spot.
Rescuing Delicate and Stretchy Fabrics Without Damage
Treating knits, lingerie, or sheer fabrics requires adaptation—meticulous sewing kit choices and deliberate hand movements guard against new snags or pulls.
From reinforcing lace straps to reattaching sweater elbows, these rules help preserve the character and fit of each garment.
Tension and Thread Selection for Stretchy or Thin Material
Opt for fine-gauge needles and extra-thin polyester thread from your sewing kit for these cases. Test thread tension on a hidden section first. Stitch slowly—avoid overstretching by letting the fabric relax under your hand.
For sheer materials, stick to lighter threads and needle sizes—excessively large tools may puncture or warp fabric. Anchor knots on the inside, then trim any fraying, while checking that outside stitches are nearly invisible when worn.
Always stitch with gentle tension, echoing how fabric relaxes after a wash. This prevents puckering and keeps the repair flush with the garment’s original lines—a fixed spot should never look tight or wrinkled compared to its surroundings.
Micro Fixes for Lingerie and High-Stretch Athletic Wear
Lingerie straps and sports bras frequently break at seams. Load your sewing kit with extra-long, super-thin needles for these fixations. Slightly overlap fabric edges and pin, sewing using compact, parallel stitches along the original seam.
For yoga pants or leggings, run stitches lengthwise instead of widthwise on a split seam—this ensures the stretchiness remains after the repair, not causing stress at just one point. Knot the thread securely, then pull on the area gently to test for stability.
Conclude by removing any duplicated overlap and gently rubbing the seam to blend it with the original fabric—if done well, even patterned leggings won’t reveal the emergency mending, keeping wearers confident during activity.
Emergency Fixes Everyone Should Know by Heart
Muscle memory ensures rapid, reliable solutions with your sewing kit. Practice a few staple moves now so they’re automatic under pressure.
Decide which maneuvers to make habitual: from securing a ripped underarm to replacing a coat button in five minutes flat, these practical actions keep your wardrobe functional and professional at a moment’s notice.
Classic Mini-Repairs for Real Moments
If you’ve ever heard a seam pop on the way out the door, keep a needle pre-threaded in your sewing kit at all times—slide it out for an instant running stitch, then reinforce with backstitches once you reach a safe spot.
For unexpected splits in jeans or slacks, pinch material edges together, layer a piece of matching scrap behind, and baste the area with large stitches. Secure with smaller, tighter stitches before removing the backing for a strong, virtually invisible mend.
If a skirt’s hook and eye comes undone, use your kit’s safety pin to reattach temporarily, but reinforce with dense stitches at home—test the closure by fastening and unfastening before retiring the kit for the day.
Script for Button Emergencies
“Grab the right button, check the fit—thread the needle, poke through, and loop four times. Tie, snip, press.” Recite this as you work. Streamlining your actions like a recipe ensures consistent, quick repairs without skipped steps.
Engineer predictable outcomes by always knotting thread twice for added strength. Check completed buttons by tugging twice—well-installed buttons resist gentle pulls and return to position naturally.
Bonus: Always keep at least two spare buttons in your sewing kit, wrapped securely in a corner of the pouch. This habit ensures you’re never left short when urgency strikes next.
Moving Forward with Your Micro Lifestyle Sewing Practice
Keeping a nimble sewing kit close at hand is a micro lifestyle skill with outsized rewards. Every new patch or mend naturally improves your comfort and adaptability with everyday clothing.
The skills built with a sewing kit translate to smoother mornings, more confident outings, and fewer panicked wardrobe changes. Practice each action so it becomes as routine as tying your shoes or folding laundry.
Retain a mindset of readiness—treat each fix as both a learning moment and a practical win. After all, the best micro skills are the ones that become invisible parts of your day-to-day competence going forward.
Frequently Asked Questions
How can I avoid losing needles in my sewing kit?
Keep needles inserted into a small square of felt or a magnetic strip inside your kit. Always account for every needle at the end of each use—perform a quick visual check before zipping the pouch closed.
What’s the fastest way to reattach a button with a sewing kit?
Thread your needle in advance with enough length for four passes. Press the button into place, sew firmly across each hole, and knot securely on the inside, tucking the tail to avoid loose ends.
Should I pre-thread needles for emergencies?
Yes, keep at least one pre-threaded needle in your kit—preferably in a neutral thread color. This speeds up repairs and eliminates fumbling, especially when you’re in motion or under poor lighting.
How often should I refresh the supplies in my kit?
Check and replenish your sewing kit every two months, replacing dull needles, empty thread spools, and any worn tools. Try minor practice runs regularly to confirm everything functions smoothly, especially before travel or busy event weeks.
Is there a way to fix ripped seams on stretchy clothes so they don’t pucker?
Choose a fine needle and stretch-friendly thread, then sew slowly with relaxed, small running stitches. Let the fabric relax fully between stitches and test the seam by stretching gently before finishing off—this prevents puckering or tautness after the fix.