Rushing between tasks and meetings usually means there’s no time for a professional nail appointment. But squeezing in an at home manicure brings a touch of self-care into the tightest schedules if you know a fast approach.
Quick self-care rituals like an at home manicure build confidence—they don’t just make your nails shine but also set a positive tone for the rest of your day. The skill also fits into anyone’s daily routine.
With just ten minutes, anyone can create a tidy, finished look on their hands. Follow this micro lifestyle skill guide for dependable, effortless results every single time you reach for nail polish at home.
Prep Your Nails for Flawless Results Every Single Time
Start by creating a clean, blank canvas for your at home manicure. Clear away old polish, dirt, and oils before you ever pick up nail color. This boosts staying power and a neat finish.
Use a gentle, acetone-free remover. Get into the habit of thoroughly washing and drying your hands to keep the nail bed dry, giving polish the best chance to adhere and last longer.
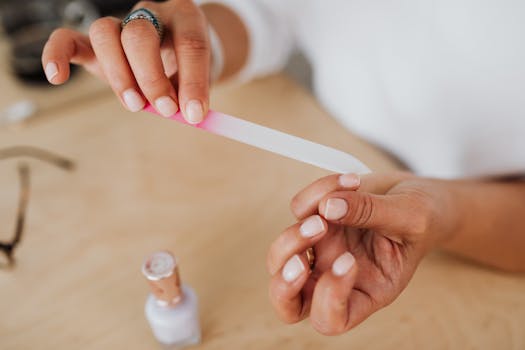
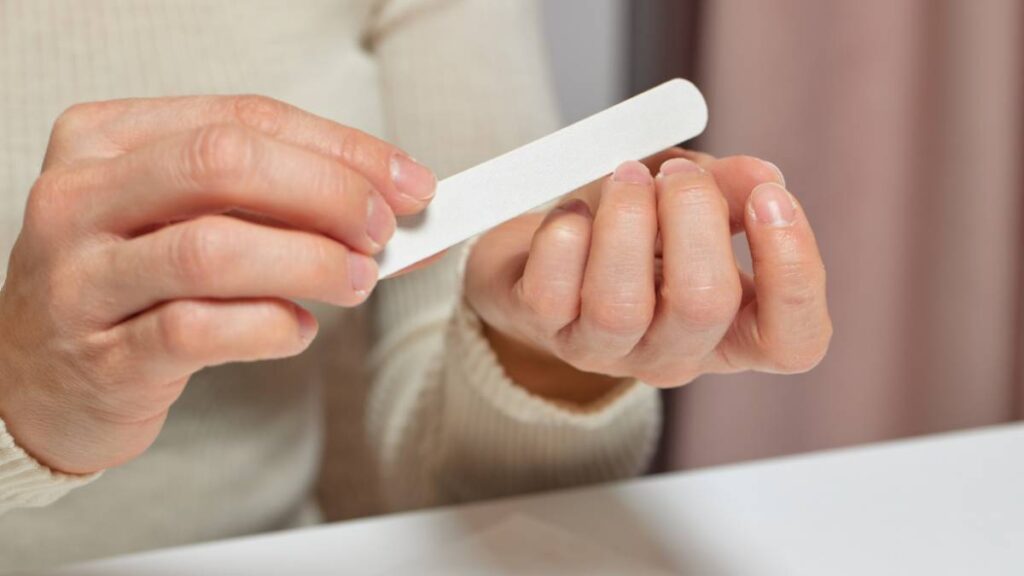
Shape and Smooth: Get Your Foundation Right
Hold the nail file parallel to your nail tip—avoid a seesaw motion. Filing in one direction prevents splitting and helps nails stay strong, forming the shape you prefer for your at home manicure.
Select a nail buffer to gently address ridges and deliver evenness. Just a few strokes add natural shine. Stop when nails feel smooth and uniform—over-buffing weakens the nail instead of prepping it.
Wipe nails with remover or alcohol afterward. Clean, dry nails keep all oils away so polish will grip and wear beautifully after this first step of your at home manicure routine.
Cuticle Check: Maintain—a Little Goes a Long Way
Push cuticles back gently with an orange stick instead of cutting. Trim only hangnails or obvious rough edges—cutting can cause issues or infection with repeated at home manicures.
Rub in a little cuticle oil and let it soak for 30 seconds, then wipe off the excess oil with a tissue. Too much oil left behind can affect polish staying power in your next steps.
A quality at home manicure relies on clean, healthy cuticles, not over-processed ones. Taking even just 60 seconds this way keeps hands looking cared for without adding unnecessary risk.
| Step | Tool Needed | Time Required | Pro Tip |
|---|---|---|---|
| Remove Polish | Cotton pad, remover | 1 min | Use acetone-free remover to avoid dryness |
| File & Shape | Nail file & buffer | 2 min | File only in one direction for less breakage |
| Cuticle Care | Stick & oil | 2 min | Push, don’t cut, for safe upkeep |
| Wash & Dry | Soap & water | 1 min | Ensures polish will stick evenly |
| Base Coat | Base polish | 1 min | Prevents staining and increases wear |
Pick Practical Tools and Products for Speed and Consistency
Select tools designed for quick action. Having your at home manicure kit organized and ready means no time spent rummaging, so you can finish in 10 minutes from start to shine.
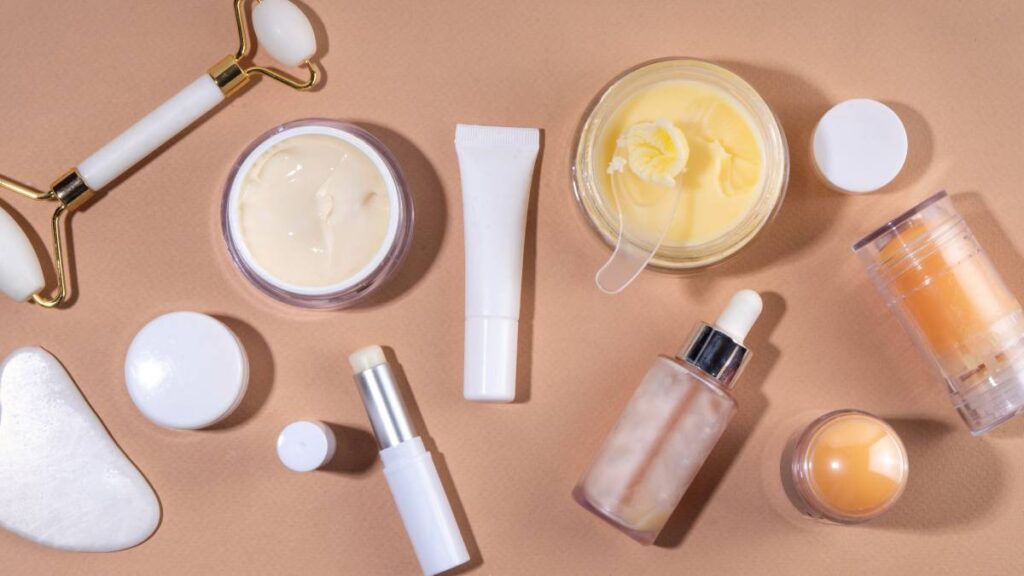
Stick to five core items: nail polish remover, file, buffer, cuticle stick, and polish. Add a top and base coat for extra durability, but don’t go overboard with specialty tools if you’re short on time.
Core At Home Manicure Kit: Keep It Simple
Efficient at home manicure routines count on tools that work consistently. Prioritize quality over quantity—a sturdy glass file, a compact buffer, and trusty remover cover your basics in any situation, even as surprises arise.
- Keep your base coat close: Protects nails and primes for color, all in one swipe for efficiency.
- Choose a fast-drying top coat: Preserves color and combats smudges, even when multitasking at your desk post-manicure.
- Store polishes upside down: Prevents settling and thickening, so every at home manicure glides on evenly—skip the frustration.
- Use a reusable buffer block: Takes off ridges in seconds and keeps more polish on your nail instead of the file.
- Pocket a mini moisturizer: Hydrated hands show off your finished look, not rough cuticles, right after any at home manicure session.
Well-chosen tools take out the guesswork and save time. Place your kit in a zip bag—grab and go, even between virtual meetings.
Optional Extras: Upgrade When You Want
Once your basic at home manicure kit feels second nature, layer in extras as needed. Examples include nail clips for easier polish removal and precise detail brushes for clean color lines.
- Add a nail polish corrector pen: Quickly fix polish on skin or sidewalls without redoing an entire nail after a slip.
- Try a quick-dry oil: Speeds up dry time so you return to your routine in under three minutes.
- Stash a latex barrier: Makes ombre or creative colorwork stress-free by catching accidental smudges.
- Incorporate a compact LED lamp: If you use gel, a lamp accelerates cure times for professional-level durability.
- Slip in vitamin E capsules: Open and rub in for nail strength between at home manicure sessions, giving nails their best chance to grow and resist splits.
Optional extras boost your results, but the core kit is enough to master a reliable at home manicure every week.
Apply Base and Color Polish for Seamless Coverage
Lay your foundation for a resilient, smudge-proof manicure by applying thin coats and letting each layer dry thoroughly before the next. This habit makes your at home manicure last longer and look more polished.
Decide on your polish color before you start. Hold the bottle against your skin to preview the match—it’s a realistic step that eliminates mid-process indecision and speeds up your at home manicure routine.
Approach for Flawless Polish Application
Place the brush just above the cuticle and swipe forward in a straight line. Use three strokes per nail: middle, side, side. Resist overworking—too many strokes can cause streaks or bubbles.
Opt for two thin coats instead of one thick layer, which slows drying and creates chips. If you want more color intensity, add one extra coat only after the earlier one fully dries.
Allow at least 45 seconds between coats. Give yourself a chance to breathe and flex your fingers gently—it’s like resetting your concentration before the next step in your at home manicure.
Prevent and Repair Polish Mishaps
If you see polish flooding a cuticle, stop, clean the brush on tissue, and press the clean edge above the mistake to absorb the excess. Use the tip of a wood stick dipped in remover for tiny clean-ups.
Pausing after each nail lets you check for slips right away instead of waiting until finished. Touch-ups now are faster and less noticeable—a key lesson from real-life at home manicure scenarios when distractions pop up.
Never rush tricky nails. When your dominant hand paints the other, steady your elbow on a table to anchor your arm. It keeps motion controlled and results even, every session.
Finish Fast with Quick-Dry Top Coats and Smart Hacks
Sealing your nails with a top coat locks in color and adds shine, preventing accidental smudging during your last sips of coffee or while gathering keys for a commute. Pick a top coat labeled “quick-dry” for best results.
Layer polish only when previous coats are dry to the touch. Wave hands gently, never blow on nails—a common mistake that can introduce bubbles. This fast approach maintains your salon-level at home manicure, even on your own schedule.
Quick-Dry Tips for Busy Mornings
Placing hands in front of a fan helps evaporate solvents rapidly. If you have time, dipping nails in cold water cuts the drying process from minutes to moments; ice cubes aren’t necessary, just cool tap water will do.
If you must multitask, wear disposable gloves while nails finish drying underneath. This step keeps surfaces and nails safe and is taken directly from situations where someone needs to type or drive soon after their at home manicure.
Set a phone timer to avoid checking nails too early. When it vibrates, you’ll know your polish has hardened—a small but useful hack that pays off every time you use it.
Lock in Finish and Prevent Early Wear
Reapply a thin layer of top coat every few days. This practice takes just a minute and keeps color lively, preventing early tip wear on your at home manicure.
At home, avoid washing dishes or scrubbing for an hour post-manicure even with quick-dry formulas. Wear gloves to protect polish from soapy water and chemicals, supporting long-lasting wear.
Inspect nails for tiny chips. Seal small gaps with extra top coat at night so your at home manicure extends toward the weekend without time-consuming touch-ups.
Streamline Your Steps: 10-Minute Checklist for Perfect Nails
This section will make sure you can follow the sequence without missing anything. Print out or save this practical at home manicure checklist, designed for real-world efficiency and zero wasted motion.
- Gather all tools and polish needed, then clear a table or bathroom counter for space.
- Remove old polish and wash hands thoroughly, ensuring the nail surface is dry and free of residue.
- Shape and buff nails, smoothing tips and using short, slow strokes to avoid splits.
- Push back cuticles gently and lightly oil, then wipe clean; skip cutting unless absolutely necessary.
- Apply base coat, color, and quick-dry top coat—each with just 2-3 brush strokes per nail; dry between coats with the fan trick.
Finishing in 10 minutes comes down to focus and minimizing distractions. Each step reinforces the micro lifestyle approach—simple, fast, and repeatable every week or before unexpected video calls.
Small Adjustments for a Personalized At Home Manicure Routine
Adapting your routine to your exact schedule and style pays strong dividends. Try a weekly evening ritual or use lunchtime as an opportunity to fit in an at home manicure with your favorite playlist for relaxation.
A shorter or longer nail shape depends on your lifestyle—keep yours neat but practical for tasks like typing or childcare. Notice which steps feel rushed and spread them out across the week instead of cramming everything into one session.
Color Choices Reflect Mood and Occasion
If you gravitate toward neutrals, use sheer colors for quick touch-ups. Bright shades might mean an extra coat but offer a big visual reward as part of your at home manicure repertoire.
When you crave variety, alternate accent nails or patterns, even if it’s only a simple dot or stripe. Embrace tiny creative touches—they make routine feel more like personal time and less like another task.
Record your favorite combinations in a photo album for quick inspiration. Refer to it when you want to break out of color ruts, ensuring your at home manicure routine always stays fresh and motivating.
Mini Recovery Plan for Emergencies
Unexpected chips or smudges stand out after a day of typing or household chores. Tuck a travel polish or correcting pen in your bag for quick fixes—dab, let dry, then apply top coat to blend.
For larger chips, file the edge smooth and repaint the tip using a small brush. This spot-treatment method saves the look without starting over, a trick experienced at home manicure fans swear by.
If nail polish fully peels, wipe the nail, smooth the edge, and go bare until your next at home manicure. Healthy nails always look intentional when trimmed and filed to match.
Make Fast Manicures a Micro Lifestyle Skill With High Impact
Completing an at home manicure in ten minutes shares the same transformative energy as brewing good coffee or prepping lunch—quick, intentional actions set the mood for your day. Each session builds your confidence and polish technique.
Adopting this micro lifestyle skill means adapting steps to suit your mood, tools, and available time. Paying attention to the small cues—like choosing polish to match your outfit—keeps the process enjoyable, not a chore.
Try one new tweak on your next at home manicure: switch color, introduce a top coat, or file a different shape. Notice how these adjustments impact your mood and hands throughout the week for real, sustained benefit.
Frequently Asked Questions
How long will an at home manicure typically last?
A typical at home manicure should last up to seven days if you prep nails well and seal them with a quick-dry top coat. Touch up chips as needed between sessions to extend wear.
What’s the fastest way to dry my nails without smudging?
Using a quick-dry top coat and running your hands under cool tap water for 30 seconds speeds up drying. Avoid blowing on nails or waving hands in dusty areas. A small desk fan aids, too.
How do I prevent nail polish bubbling during my at home manicure?
Apply thin layers of polish and pause to let each one dry before adding another. Shaking bottles can add bubbles, so roll them gently between palms. Work in a cool, dry area for best results.
Are there tips for fixing mistakes without starting over?
If polish goes on skin, use a small brush dipped in remover to correct smudges. For chips, dab color just on the area, let it dry, then add a new top coat across the nail for a seamless blend.
Do I need to use base and top coat for every at home manicure?
Using base coat shields nails from staining, while top coat locks in color and enhances shine. Both steps are key for durability, even in a quick routine. Skipping them often shortens manicure lifespan.