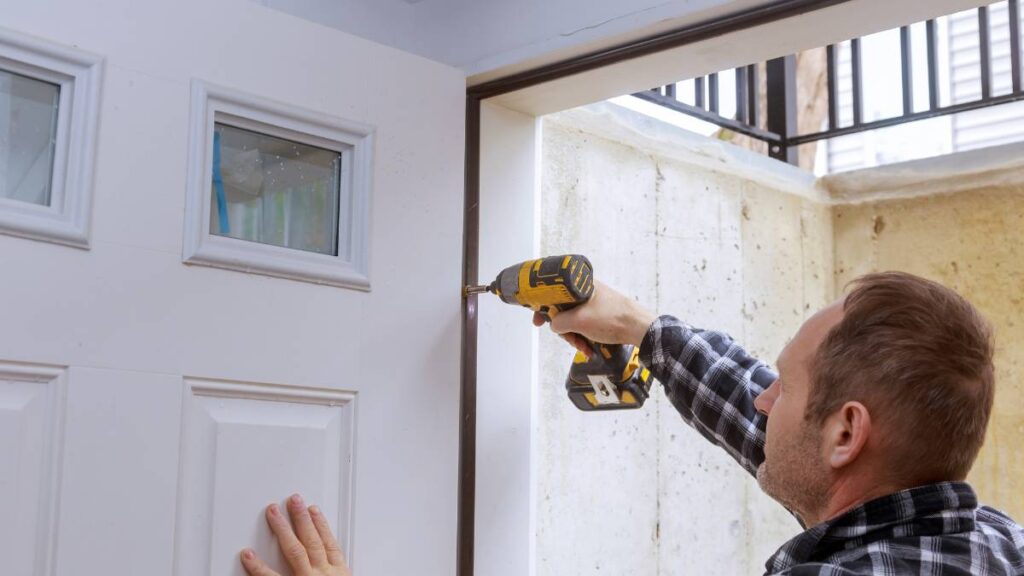
A tiny drip from your kitchen or bathroom sink never seems urgent—until you notice the growing puddle or hear that persistent tap in the silence. When a leaky faucet surprises you, a fast, competent response saves time and money while restoring peace to your space.
Even without plumbing experience, most people can stop a leaky faucet with a few household tools and some focus. Learning this small skill gives you control over daily annoyances and makes you more self-reliant around the house.
This article walks you through proven, step-by-step tactics to tackle leaky faucet problems and keep your fixtures working quietly. Read on for practical tips, hands-on checklists, and advice you can use immediately.
Troubleshooting Common Leaky Faucet Problems Efficiently
The moment you spot a leaky faucet, you can quickly pinpoint causes using a clear, logical method. Understanding the exact source minimizes stress and nonsense work.
Many leaks begin with worn washers, loose parts, or aging gaskets. Each scenario creates very specific symptoms you’ll see or hear, which helps focus your next steps with confidence.
Identifying the Exact Leak Location in Seconds
Carefully dry the entire faucet with a hand towel. Watch the area while the water’s off and on, noting if you see water beading around the base, handle, or spout.
If the leak pools beneath the handle each time you run water, you likely face an O-ring issue. Water streaming from the end of the spout suggests a valve seat or washer problem.
Use slow, careful movements and direct lighting to notice subtle patterns. A small flashlight can highlight drops or seepage you’d miss under overhead lights. Mark wet spots with a sticky note for reference.
Listening for Leak Clues During Daily Use
Listen closely for drips right after you turn off your faucet. A single drop every few seconds from the spout, even if the handle is tight, points to an internal washer or valve issue.
If you hear faint hissing or dripping inside the cabinet, investigate the supply lines—compression nuts or inlet pipes may need tightening. Gentle tapping or creaking near the base signals a loose mounting nut nearby.
By matching these real-world sounds and sights, you’ll diagnose your leaky faucet’s specific problem and adjust your repair approach for quick success every time.
| Leak Symptom | Most Likely Cause | Tools Needed | Immediate Action |
|---|---|---|---|
| Drip from spout after shutoff | Worn washer or cartridge | Phillips screwdriver, pliers | Replace washer or cartridge |
| Water at faucet base | Loose mounting nut or gasket | Basin wrench | Tighten nut or replace gasket |
| Leak under sink | Loose supply line | Adjustable wrench | Tighten connections |
| Handle hard to turn | Debris or corrosion | Penetrating oil, brush | Clean and lubricate |
| Puddle after faucet use | Bad O-ring | Pick tool, O-ring set | Replace O-ring |
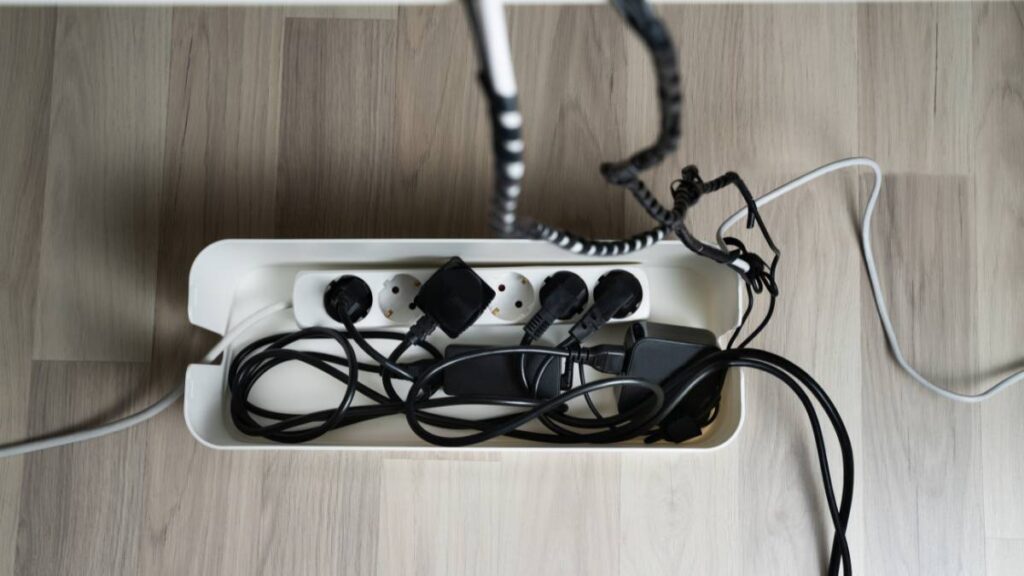
Gathering the Perfect Tools and Materials for Fast Fixes
Efficient repairs on a leaky faucet start when you have the right tools within reach. Organizing these ahead speeds up the process and feels less frustrating once water is shut off.
The best tool kit for a faucet repair includes screwdrivers, pliers, a small wrench, and possibly a replacement washer, O-ring, or cartridge. Each tool serves a specific, immediate purpose—it’s smart to lay them out in a pan or tray near you.
Setting Up Your Workspace for Success
Clear everything from around the sink and cover drain holes with a towel or mesh catcher. This step catches small screws or washers if they slip out of your hands and prevents lost time searching later.
- Keep a cup or bowl for small hardware—staying organized prevents losing tiny screws under the sink.
- Wear disposable gloves—avoids grime and gives you a solid grip on slippery faucet parts.
- Check lighting—use a portable lamp or flashlight to see under deep sink edges for precise work.
- Turn off water supply—shut off hot and cold valves to prevent surprise sprays and allow for calm, focused progress.
- Lay out a towel—protects counters and collects drips, so you don’t need to clean up twice.
Having tools and supplies prepped means you spend your time fixing, not searching or cleaning up preventable messes. This simple setup habit leads to smoother, faster outcomes.
Planning for the Unexpected During Repairs
Save time by double-checking the replacement part matches your leaky faucet’s style—compare old and new washers or cartridges side by side before starting.
- Match washer size—use a ruler or compare by eye, since the wrong size won’t seal correctly and the leak will persist.
- Bring damaged parts to a hardware store—show staff for a perfect match to avoid return trips.
- Inspect tools for rust or loose grips—safe, well-maintained wrenches tighten bolts faster and with fewer slips.
- Keep an old toothbrush ready—handy for cleaning out tiny debris that might prevent a full seal inside the spout.
- Take a before photo—your phone camera records parts’ placement, making reassembly simple and mistake-free.
Treating faucet repair as a small project rewards you with visible, fast progress—even when minor setbacks appear. Preparing puts you in charge of your results.
Executing the Step-by-Step Repair Sequence with Confidence
Whether you’re fixing a bathroom or kitchen leaky faucet, following a proven process keeps things moving. Line up parts and tackle each step with a steady hand, using checklists to keep momentum.
Consistently applying this method makes repairs less intimidating for anyone, even first-timers. Taking pictures of each disassembled part ensures zero confusion putting things back together.
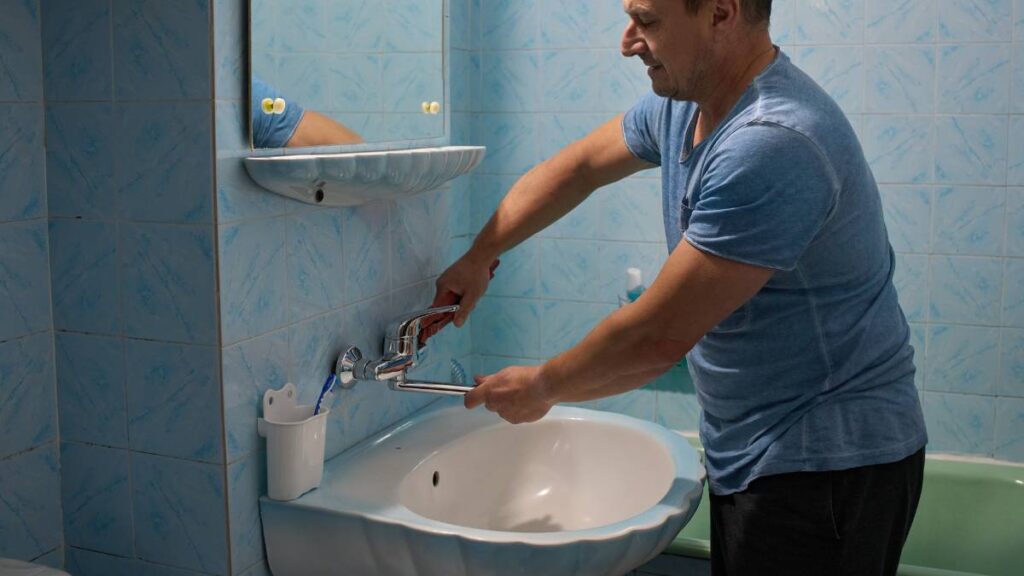
Turning Off Water and Removing Handle
Reach under the sink and turn both hot and cold shut-off valves clockwise until snug. Test the faucet to ensure water stops completely. Remove the handle screw using an appropriate screwdriver and gently pry off the handle, noting its orientation for reinstallation.
If the screw resists or feels stripped, use a rubber band over your screwdriver tip for extra grip. Lift off the handle with slow, even pressure to avoid damaging the stem beneath.
This careful removal reveals the inner workings, letting you observe which part has worn down or shows signs of mineral buildup.
Inspecting and Swapping Main Components
Carefully loosen the retaining nut with a wrench. Slide the nut and any washers free, keeping them in the same order. Check washers for tears, flattening, or cracks that admit water flow when closed.
Swap in an identical washer or cartridge, verifying fit by gently placing it onto the stem. Don’t force; a part that seats poorly usually isn’t the correct model.
Tighten everything by hand first, then with a wrench for a secure seal. Each part back in place means you’re only minutes from stopping that leak for good.
Addressing Special Cases: Cartridge and Ball Faucets
If your leaky faucet uses a cartridge or ball system, the steps adjust slightly. These models rely on replaceable cartridges or ball assemblies rather than flanged washers.
Identifying the faucet’s design takes a close look at the handle and spout shape. A single handle often means cartridge or ball, while two handles suggest a compression model.
Tackling Cartridge Faucet Repairs
After shutting off water and removing the handle, use pliers to lift out the retaining clip holding the cartridge. Pull the cartridge straight up, twisting gently if it’s stuck.
Check the cartridge body for worn rubber seals or mineral crusts. Bring the old part to a supply store; even small model variations matter when finding a replacement for your leaky faucet.
Insert a matching new cartridge, replace the clip, and reassemble. Test the faucet—if the drip stops, your cartridge swap fixed the leak immediately.
Solving Ball Faucet Drips Effectively
Loosen and remove the faucet cap next. Extract the small ball, springs, and seats underneath using pliers. Carefully compare the spring and seat set to a kit’s parts before installing new ones.
Keep springs centered and seats pressed in firmly when dropping parts back inside. Refit the ball, tighten the cap, and reattach the handle. With the correct kit and method, leaky faucet ball repairs stay dry for years.
Reconnect the water and test again—ball faucets repaired this way hold strong, quiet seals for a long time with almost no maintenance needed.
Restoring the Sink Area and Preventing Future Drips
Once your leaky faucet is back in shape, restoring your sink area minimizes future trouble. Clean up residual water quickly to prevent mold, mildew, or slippery spots after every repair job.
Inspect the faucet for wobbles, loose screws, or minor leaks. Conclude with a sequence of preventative actions that keep your faucet trouble-free,”and your routine smoother into the future.
Preventative Inspection Checklist
Run down the following quick visual inspection after every repair and once a month thereafter:
- Test faucet handles for smooth turning—stiff movement points to buildup, while excessive play hints a loose nut below the sink.
- Check spout tip for lime scale—white deposits block flow; wipe down with a vinegar-soaked cloth for clarity and sanitation.
- Scan under sink—look for stains or fresh drops around shutoff valves; early detection helps prevent bigger leaks.
- Feel for moisture at the faucet base—cool wetness signals a potential gasket issue; dry with a towel and watch for recurring moisture.
- Listen for unexplained noises—gentle hisses or gurgles from inside the cabinet suggest water is leaking even if you can’t see evidence yet.
Taking five minutes to complete this maintenance list can prevent costly surprises from a leaky faucet and give you full confidence in your handiwork.
Streamlining Repairs by Using Everyday Household Items
With supplies short or hardware stores closed, resourceful fixes for a leaky faucet are possible using items already found at home. Learn which substitutes work and when to use them safely.
Substituting Household Supplies in Emergencies
Rubber bands work as impromptu O-rings—wrap several tightly where leaks seep until proper parts are available. Paperclips help fish out stubborn washers from deep recesses. Petroleum jelly creates a makeshift seal for threads or faucet nuts, minimizing slow drips overnight.
Apply Teflon tape from your kitchen drawer to wrap around worn threads; this quick layer improves any connection that’s leaking due to gaps. For screw heads you can’t grip, add a layer of duct tape to your screwdriver tip for added friction while loosening or tightening.
Each of these analogies—like using rubber bands as O-rings—ties an everyday skill to home repair. This adaptability saves frustration and stops leaks when traditional fixes aren’t available right away.
Short-Term Fixes When Repairs Must Wait
When immediate professional help is unavailable or you’re missing a part, you can use a towel around the faucet base to absorb slow leaks, regularly checking to wring it dry.
Propping a bowl to collect dripping water avoids water damage until longer-term fixes are possible. Turning the water supply slightly off also lessens pressure, slowing even hard-to-fix leaks until you’re ready for repair.
While these solutions are temporary, they minimize hassle, prevent water stains, and keep your living space functional until a permanent leaky faucet repair is done.
Building Micro Lifestyle Skills Through Faucet Repairs
Each time you fix a leaky faucet, you exercise problem-solving and self-confidence—micro lifestyle skills that transfer to other household challenges. Repeating these skills strengthens your ability to adapt and handle new situations with calm attention.
Imagine showing a child or friend how to replace a washer. You’re not only ending an annoying drip but passing along independence and practical know-how. These skills stay useful for years, supporting a more organized, peaceful home.
Translating Home Repairs to Other Life Skills
The confidence built during a leaky faucet repair—matching tools, following steps, trusting your choices—applies to everything from assembling furniture to managing personal schedules.
Troubleshooting faucets hones practical observation, like pinpointing the origin of a strange sound or a subtle leak. Applying the same logical sequence to other tasks makes new problems less daunting by default.
Recording steps, laying out supplies, and cleaning as you go are repeatable habits that improve efficiency long after the faucet falls quiet. Progress grows more visible each time.
Scenario: Teaching the Fixing Process to Someone Else
When a roommate asks how you stopped a leaky faucet in five minutes, walk them through each action: “I grabbed these tools, paused to shut the water, then swapped the washer.”
Smile and offer your photo-guide or checklist to build their confidence. Include caution about water shut-off and replacing parts only with the same size for best results.
Share small hacks you learned—like using a headlamp for under-sink work—instilling independence and teamwork alongside technical skill. People often remember hands-on help long after the task is done.
Making Quick Fixes Part of a Sustainable Daily Routine
Every fast fix for a leaky faucet contributes to a home that runs smoothly and a routine that saves resources. Small, daily improvements lower utility bills and reduce water waste.
Consistently checking for signs of a leak—like unexpected puddles or running water sounds—helps spot issues before they grow. Efficient repairs keep the household flowing and set a mindful tone for daily upkeep.
Feel proud as small skills add up: you’re building a toolkit of abilities that support calm, low-stress living. Every successful faucet repair strengthens trust in your resourcefulness and keeps your home one step ahead of trouble.
Frequently Asked Questions
What causes a leaky faucet most of the time? A leaky faucet typically stems from a worn washer, deteriorated O-ring, or faulty cartridge. Identifying the pattern of the drip and the faucet’s style helps you target the right part to replace for a lasting fix.
Should I shut off water to the entire house to repair a faucet? Usually you only need to turn off the hot and cold valves under the sink. This prevents accidents and lets you focus on the faucet itself without worry. House-wide shut-off is rarely necessary for a basic repair.
Is replacing a faucet cartridge difficult for first-timers? With the right tools and a replacement cartridge, first-timers can complete this repair by carefully following a clear set of steps. Taking photos before and during disassembly helps ensure the entire process feels manageable and low-stress.
How can I make a temporary fix until I buy replacement parts? Wrap a rubber band over the leak area or use a towel to absorb slow drips. Collecting water in a bowl or lightly shutting off the supply valve are helpful temporary measures until you’re ready to fully repair your leaky faucet.
What’s the best tool for tightening leaky faucet parts? An adjustable wrench, sometimes called a basin wrench, gives you solid control and reach under cramped sinks. Always match the tool’s jaw size to the nut or bolt to avoid stripping or overtightening during your repair.