
You’ve probably noticed a car stranded with its hood up, someone pacing around, unsure where to start. The ability to jump start car safely is invaluable in these moments.
Dead batteries catch people off guard, whether on a chilly morning or after a busy day. Knowing what to do can prevent added stress and keep you moving forward without delay.
This step-by-step guide shows you how to jump start car safely with minimal tools, ensures you stay safe, and gets your vehicle running in no time.
Identifying the Battery Problem Quickly Saves Time and Headaches
Before you even pop the hood, glance at your dashboard. If your lights or electronics seem weak, you can reasonably suspect the battery is the issue.
Not every car issue is a battery problem, but knowing what it looks and sounds like helps set the correct path toward a jump start car safely.
Listen for Telltale Clues When Turning the Key
A clicking noise or silence, instead of the usual engine start, signals a likely dead battery. This immediate cue helps you avoid wasted effort checking other systems first.
If the dash lights flicker or don’t turn on at all, that pinpoints electrical trouble, distinct from fuel or starter issues. You can confidently move to test the battery.
For drivers worried about misinterpretation, focusing on these unmistakable symptoms prevents unnecessary steps and cuts down stress during a jump start car safely attempt.
Visual Inspection Offers Quick Confirmation
Open your hood and check battery terminals for corrosion or wires that seem loose. Clean terminals maximize your efforts to jump start car safely without extra complications.
If you spot white or blue crust on the battery posts, grab a cloth and gently wipe them down. Ensure you wear gloves to protect your hands before touching anything.
Look for swelling or leaks on the battery case. If either appears, don’t proceed with a jump—replace the battery to avoid personal risk and vehicle damage.
| Symptom | Visual Cue | Likely Issue | Recommended Action |
|---|---|---|---|
| No lights, no crank | Dash dark, no sounds | Battery dead | Jump start car safely |
| Clicking only | Lights flicker weakly | Low voltage | Jump start car safely |
| Engine cranks slowly | Dim headlights | Partially charged battery | Jump start car safely |
| Corroded terminals | White/blue deposits | Poor connection | Clean before jumping |
| Swollen battery | Bulging sides, leaking | Battery failure | Replace, don’t jump |
Gather and Check Minimal Tools for a Smooth Experience
Having the right minimal tools ensures your jump start car safely attempt goes off without a hitch. Keep essentials ready so you’re never caught unprepared.
Start with a basic set: working jumper cables with intact insulation, gloves for safety, and perhaps a portable jump starter. Quick access makes a difference during emergencies.
Double-Check Jumper Cables for Safe Operation
Inspect cables for cracks or exposed metal before connecting them to ensure they deliver current reliably. Replace damaged cables promptly to prevent shorts or shocks.
Untangle and lay cables flat on the ground to reduce the risk of accidental contact. Never let the metal clamps touch once connected to a battery terminal.
- Check for damaged wire insulation. Frayed insulation can expose you to dangerous current and cause shorts—replace your cables if you spot any signs of wear.
- Inspect clamp springs for a firm grip. A strong spring ensures solid contact with terminals, increasing your chance to jump start car safely with minimal interruptions.
- Test connection fit before use. If clamps don’t grab battery posts snugly, adjust or swap them for a better set to avoid loose connections and erratic current flow.
- Check clamp cleanliness. Dirty clamps fail to make good contact—scrub away residue for a strong, consistent arc during your jump start car safely procedure.
- Have cable length ready. Standard cables should stretch comfortably between two vehicles. Longer isn’t always better—too much slack can tangle and trip participants.
Following this cable checklist ensures a smoother, faster jump start car safely experience, keeps everyone safer, and gets the vehicle started on the first try.
Assess and Prepare Portable Jump Starters
Portable jump starters offer a quicker solution when another car isn’t around. Check charge status every month, and recharge after each use to ensure readiness.
Review the device’s instructions for correct clamp placement and confirm it matches your vehicle’s battery size. The wrong setting reduces the odds you’ll jump start car safely.
- Charge jump starter fully after each use. Consistent charging ensures it’s ready so you don’t run into another problem when trying to revive your battery the next time.
- Read included instructions. Each model has unique operating procedures. Knowing the right steps before using one prevents confusion in stressful jump start car safely attempts.
- Keep clamps attached and stored securely. Well-organized jump starters prevent lost parts and let you act quickly, which is essential in urgent situations.
- Store your device in a temperature-stable area. Extreme heat or cold reduces battery life, leaving you without power when you truly need a rescue.
- Test monthly by starting a small engine. Regular checks confirm performance. If output weakens, replace the device for peace of mind and guaranteed emergency help.
Routine checks and proper storage extend the lifespan of your jump starter, ensuring it’s ready to safely help anytime you’re in a pinch.
Safe Setup Avoids Risk for You and Your Vehicle
To jump start car safely without risk, set up the scene carefully. Only begin once both vehicles are off, parked on flat ground with plenty of space around each car.
Keep yourself and others clear of moving parts or potential arcing. Maintain steady focus and follow each step with patience to avoid injuries.
Parking Position Impacts Success and Safety
Align both cars so the batteries are close, but be sure the vehicles never touch. Park securely and engage parking brakes on both, especially on an incline or decline.
Lifting the hood fully and tucking away any dangling sleeves or lanyards improves maneuverability, lessening the chance you’ll brush against moving engine components.
Check that all lights and accessories are OFF on both vehicles. Minimizing extra drain keeps the jump start car safely focused on reviving the battery alone for best results.
Safety Checklist Creates Predictable Outcomes
Wear non-conductive gloves as you connect jumper cables. Use goggles for added protection from accidental sparks or battery venting. Model calm, deliberate movements.
Keep metallic objects and jewelry away from your hands; they can conduct electricity or catch on cables. Remove and set aside rings, watches, and bracelets temporarily.
Have another person stand by ready to call for help if needed. This practical step ensures you’re not alone in case of mishap during the jump start car safely effort.
Step-by-Step Connection Order Ensures a Safe Jump Start
Following the correct jumper cable connection sequence prevents dangerous sparks and short circuits when you need to jump start car safely with only minimal tools available.
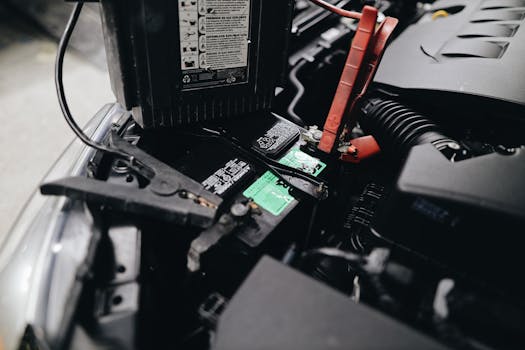
Connect one end of the red cable to the dead battery’s positive terminal. Then, attach the other red clamp to the positive terminal of the working battery.
Negative Cable Placement Makes a Crucial Difference
Attach one black clamp to the negative (-) post of the healthy battery. Instead of connecting the other black clamp directly to the dead battery, choose an unpainted, metal engine ground nearby.
This bypasses possible explosive gases at the dead battery and lowers the likelihood of arcing. You create the safest environment and reduce risk of injury during your jump start car safely steps.
Always check that clamps don’t touch moving engine components. Engine grounds are typically easy to spot but refer to your manual if uncertain. Firm clamp contact supports full current flow.
Double-Check Connections Before Attempting to Start
Ensure every clamp holds tight without wiggling. Unstable connections cause sparks or fail to transmit power, stalling the jump start car safely process before it begins.
Step to the side when starting the working vehicle, reducing exposure to any accidental arcs. Let the healthy car run for several minutes to feed current and charge the dead battery a bit.
If the revived car turns over, hold the starter switch for only three seconds per attempt. Rest between tries, letting cables cool and preventing overheating of essential components.
What To Do Right After Starting: Steps That Prevent Repeat Problems
Once your car starts, keep both engines running for a few minutes. This brief charge gives the battery enough juice to ensure a reliable restart after you disconnect.
Remove cables in reverse order—first black from the grounded spot, then black from the helper battery, followed by the red clamps—without letting them touch one another.
Recheck Electrical Accessories and Battery Charge
Turn off any accessories in the revived car: headlights, stereos, seat warmers, and defrosters. Reducing the load supports battery recovery and lowers draining demands on the new charge.
After running the car for ten to fifteen minutes, drive for at least thirty minutes at moderate speed. This lets the alternator recharge the battery as you travel.
If warning lights remain or electronics falter even after a good run, the battery or alternator may be failing. Schedule a thorough diagnostic to ensure future jump start car safely attempts aren’t necessary.
Common Pitfalls and Safety Solutions for Reliable Results Every Time
Ignoring setup details or skipping steps can leave you stranded again. Address common mistakes with these action-first tips that avoid damage and improve every jump start car safely attempt.
Stay focused on sequence, connection clarity, and safe cable handling. Repeatable success starts with these foundational habits and simple routines anyone can master.
Mistake-Proof Cable Handling
Keep cables separated when not connected. If clamps ever touch during setup, disconnect immediately and reset before restoring battery contact—this breaks any unsafe circuit without harm.
Always grip cables by insulated handles. Avoid contact with bare metal, especially during or after engine cranking, to keep risk minimal during a jump start car safely.
After use, coil cables loosely and store in a dedicated case. This preserves integrity and readiness for the next emergency scenario.
Preventing Repeat Battery Failures
Note every instance you need to jump start car safely. Recurrence indicates the battery is nearing end-of-life or the charging system needs professional inspection.
Keep your battery’s surface clean and dry. Moisture or grime can create conductive paths, draining charge and causing unnecessary battery loss.
Let professionals test your charging system after a jump—auto parts stores frequently provide this as a courtesy, making diagnostics quick and convenient before the next drive.
Concluding Thoughts on Quick, Safe, Minimalist Jump Starts
A successful jump start car safely approach rests on solid habits and clear steps. Each routine—from preparing cables to post-start checks—contributes to safety and reliability.
Equipped with these methods, you can confidently address battery stalls, avoid common missteps, and minimize the chance of extended downtime.
Practicing these principles means you help yourself and others efficiently—showing care on the road while keeping everyone’s vehicles running smoothly in every situation.